
Poster production, create splash oil painting style character avatar posters in PS – poster design
Create a splatter oil painting style character avatar poster in PS Original picture: Operation steps: 1. Create a new canvas of appropriate size, open the character picture, crop the appropriate area, and fill the screen. The case used here is 2000*3000 pixels and 300 resolution. 2Ctrl+J Duplicate a layer, as shown in the figure, select Filter-Stylize-Contour, adjust the color levels, and you can see rich contours. 3. Shit+Ctrl+U to remove the color and turn it into a monochrome line drawing. That is to say, the preliminary line drawing is extracted. 4. Apply Filter – Filter Library – Sketch – Note Paper to this layer of line art in sequence. (This will give you the paper texture and make these outlines more visible.) 5 Create a new layer, fill it with color #bdae9a, and change the layer blending mode to “Multiply”. 6. Copy the original character image on one layer and place it on the top layer. Apply once: Image-Adjustments-Threshold. Just adjust the threshold level to make it look like a print. 7 Change the layer blending mode of the Threshold layer to “Multiply” and the opacity to 65%. You can get the following effect. 8 is the layer after threshold…

Poster production, make a Gu Ailing domineering Winter Olympics skiing poster – poster design
Gu Ailing is a legend in the Winter Olympics. Every time he appears, he arouses people’s eager attention. Below we will use PS to create an Olympic poster for her to cheer for and pay tribute to our Olympic athletes! Rendering: To learn PS, please go to www.16xx8.com Operation steps: 1. Create a new file Open the PS software, press Ctrl + N to create a new file with a size of 1920 × 1298 pixels and a resolution of 72 pixels/inch, then OK. 2. Add background color Create a new layer, set the foreground color to dark gray #9b9b9b, then use the paint bucket tool to fill it with the set color, and change the layer opacity to 80%. Add layer Mask http://www.16xx8.com/tags/38847/, use the black and white gradient tool, select linear gradient, and pull out the transparency effect in the upper right corner area, as shown below. 3. Add background material Open the snow mountain material below, drag it in with the move tool, press Ctrl + T to adjust the size and position, press Ctrl + Shift + U to remove the color, and then change the layer opacity to 20%, as shown below. 4. Import character…

Poster production, create dynamic Messi-themed sports posters – poster design
Hello everyone~ The tutorial I want to share with you today is how to make a dynamic sports poster Operation steps: STEP 1Create a new document with the following parameters Create an adjustment layer – Solid Color #74acdf Import character materials Ctrl+J Duplicate one layer, hide first Ctrl+T transforms the image, Shift+alt stretches the character material and adjusts its position (don’t forget to delete unnecessary things with a clone stamp) Layer Blending Mode – Soft Light Create a new layer and select the Brush Tool – Soft Brush (white 511px) Click on the upper right corner of the canvas and change the layer mode to – Overlay Create a new layer, select a black soft-edged brush, and paint it in the lower left corner of the canvas Use Shift+left click to select the following layers, Ctrl+G to create a group STEP 2 Select the character layer, use the pen tool, and outline the main structure (cutting out pictures requires a lot of patience, come on) Right click – create a selection, Ctrl+J to copy the selection Text Tool – Parameters are as follows (Font: Bebas Neue, Size: 60pt, Color: Black) Enter 10, Ctrl+T to transform and adjust the font size…
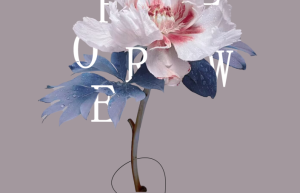
Poster production, making posters with graphics and text interspersed effects – poster design
Create posters with graphics and text interspersed effects Rendering: For beginners to learn PS, please go to: www.16xx8.com Operation steps: 1. Fill the background with any color and import the bouquet material 2. Use the “Text Tool” to input text, estimate the interspersed position and place the text in advance 3. Press Shift to select all text and Ctrl+G to create a group, then click on the bouquet layer to create a selection 4. Select the text group layer, hold down Alt and click Mask http://www.16xx8.com/tags/38847/ to create a white mask, and use the “Brush Tool” to smear and hide the text. Or appear to achieve the interspersed effect Complete: For beginners to learn PS, please go to: www.16xx8.com

Poster production, four-color printing poster effect – poster design
The four-color printing effect is different from the color halftone in PS. It is produced using real printing logic to achieve real effects and increase the texture of the picture. Rendering: If you want to learn more, please visit www.16xx8.com Operation steps: 1Click [Image] menu bar – [Mode] – CMYK color. 2Select the color panel in the upper right corner. If it is not available, open it in the [Window] menu bar – [Color]; then click the “small icon” in the upper right corner of the color panel to change it to the CMYK slider. 3. Click the channel panel, hold down the Ctrl key and click on the cyan channel to create a selection, and then press Ctrl+Shift+I to invert the selection. 4 Return to the layer panel, click the small “square cross” icon in the lower right corner to create a layer; change the foreground color to black, then press Alt+Delete to fill, press Ctrl+D to cancel the selection, and change the layer name to C (To facilitate subsequent operations), hide the “little eyes” on layer C. 5 Repeat the operation of step 3.4. The difference is to select different color channels in the channel panel to create…
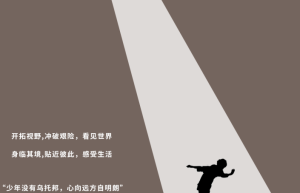
Poster production, making 2023 theme creative posters – poster design
A beam of light is shot out from the 0 of 2023, and below are people dancing gracefully. Life is like this, there is always a beam of light shining on you to move forward, so that you are no longer confused. Rendering: If you want to learn more, please visit www.16xx8.com Operation steps: 1: Light production 1. Create a new document (1080*1440), fill it with a color at will, and use the “Text Tool” to enter a number with a circle (to choose an appropriate font, the shape of the circle cannot be too small) 2. Select the “Ellipse Tool” and change the fill to white, draw a circle at the number 0 to cover the blank part, and then drag the shape (ellipse) layer below the text layer 3. Use the “Ellipse Tool” to draw a white ellipse in the lower right corner of the canvas, create a new layer, then select the “Pen Tool” and change the parameters to “Shape”, draw a closed shape between the two circles, and then change the opacity Change to 70% 4. Drag in the material, click the dragged material layer to create a selection and fill it with black, Ctrl+T “Free…
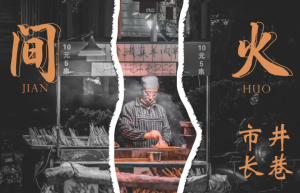
Poster production, making “Fireworks on Earth” themed torn paper posters – poster design
The tutorial uses PS to draw a torn paper poster with the theme of “Human Fireworks”. The whole poster is very creative. Students can learn according to the tutorial. The tutorial creates a very atmospheric feeling by highlighting the main character. In the middle is a brush with a string There are a bunch of catering workers, and the whole picture highlights a great sense of déjà vu with the fireworks of the world. Students, please follow the tutorial to learn. I believe that students can do better. Rendering: For beginners to learn PS, please go to: www.16xx8.com Method: 1.Ctrl+J to copy the layer, Ctrl+Shift+U to remove the color, and create a new layer filled with white 2. Reduce the opacity of the white layer to reveal the original image, and then use the “Lasso Tool” to draw a torn paper-shaped selection 3. Press Alt and click “Layer Maskhttp://www.16xx8.com/tags/38847/” to create a black mask and then restore the opacity. Hold down Ctrl and click on the black mask to bring it up. Select the selection, click [Filter]-[Pixelize]-[Lattice], size 9 4. Click [Filter]-[Filter Library]-[Brush Stroke]-[Spray Stroke], click [Select]-[Modify]-[Shrink], adjust the shrink amount to 20, and create a new image layer and…
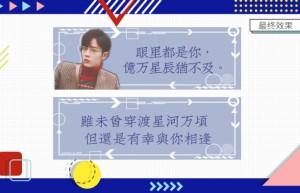
Poster production, making a support banner poster for Xiao Zhan – Poster Design
Make a support banner poster for Xiao Zhan Rendering: If you want to learn more, please visit www.16xx8.com Operation steps: Part 1 Preparation work, first of all, you need to have a PS software, secondly, prepare materials, determine the size of the hand banner, background, photos of idols, and finally, find a suitable background. If you are looking for a background, it is recommended to go to Qiantu.com. Nitu.com and Huaban.com have a variety of materials for you to choose from. Here, let’s briefly talk about how to find a background. I will use Qiantu.com as an example. First log in to the official website of Qiantu.com. Website, after logging in, search with keywords. It is recommended to filter the file types when searching, and directly select files in PSD format to facilitate filtering When we find the background template we want, we can download it. Warm reminder: When downloading, be sure to pay attention to the details on the right and pay attention to the PS version used for the background template. If your version is lower than the background template version, then you have to find it again. Lower version software cannot open higher version psd files. On…
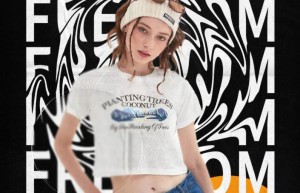
Poster production, making fashionable character posters – poster design
Create fashionable character posters Rendering: If you want to learn more, please visit www.16xx8.com Operation steps: 1. Create a new A3 document, fill the background with black, enter the text and copy several copies with Ctrl+G to group, then “Convert to Smart Object http://www.16xx8.com/tags/34209 /” 2. Click [Filter]-[Liquify], use the “Forward Transformation Tool” to draw a circle from the center outward, and import the character material 3. Add the “Exposure” command above the character layer, increase the “Grayscale Correction Coefficient”, and then add the “Brightness Contrast” command to increase a little brightness and reduce the contrast. You must create a “Clipping Mask u>http://www.16xx8.com/tags/38847/” 4. Draw a few circles under the text layer and place them at the desired location. Import the cardboard material, change the blending mode to “Multiply” and lower the “Opacity”, then create a “Layer Mask” and use a black brush to paint the desired To hide part 5. Import the granular texture material and change the blending mode to “Screen”, then lower the “Opacity” 6.Ctrl+Shift+Alt+E to stamp, draw a circle under the stamp layer, create a “clipping mask” for the stamp layer, and “convert the stamp layer to a smart object” 7. Select the circle under the…
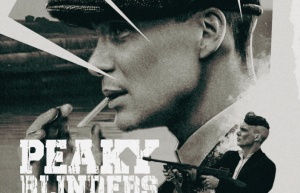
Poster production, create super atmospheric gangster character posters – background wallpaper
Create a super atmospheric gangster character poster Rendering: Search the public account photoshop tutorial forum and receive free self-study benefits Operation steps: 1. Create a new document of 1150*1440, use the rectangle tool to draw a rectangle, Ctrl+T, hold down Ctrl, click on the control point and drag to transform 2. Copy the rectangle and then Ctrl+T to enlarge it, then hold down Ctrl and click on the control point to drag to transform 3. Repeat the previous step, select Ctrl+G to group, import character materials to create “Cut and Paste Maskhttp://www.16xx8.com/tags/38847/” 4. Select the group to create “Clipping Maskhttp://www.16xx8.com/tags/38848/”, use a white texture brush to paint the bottom, import the background material and place it under the character material 5. Import another character material and “Convert to Smart Objecthttp://www.16xx8.com/tags/34209/”, click the black and white command in “Adjustment Layer” to remove the color 6. Select the large character layer and click [Filter]—[Camera Rawhttp://www.16xx8.com/photoshop/jiaocheng/2015/136179.html Filter] to reduce the white color. Add texture, clarity, and grain in the Effects command 7. Select another character layer and click [Filter] – [Camera Raw Filter], reduce the white color, increase texture and clarity, reduce “Natural Saturation” and “Contrast”, and increase grain in the “Effect” command…


