This tutorial uses PS to create European and American sculpture posters. Poster production is relatively simple. As long as you study the tutorial carefully, you can still complete it well. One of the more critical steps is to use the filter to stylize the wind, hurricane type, etc. To achieve that kind of quicksand effect, students still need to do the specific tutorials themselves. The tutorials sometimes look complicated, but in fact, as long as you practice it, you will find it very simple. Let’s learn it together.
Rendering:

Tutorial material: http://www.16xx8.com/photoshop/sucai/2019/u270928.html
Operation steps:
Open Photoshop and create a new canvas of suitable size. Fill with black background:

www.16xx8.com
Create a blank layer and select the Flexible Brush Tool. Change the foreground color to pink, paint the edges as shown in the picture, repeat this step and paint with blue and cyan:
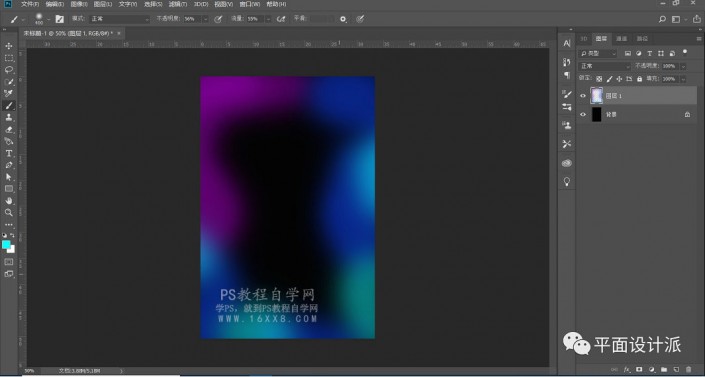
Execute Filter – Blur – Dynamic Blur, the parameters are as shown below:

And on the Layers panel, lower the Opacity to 50%:
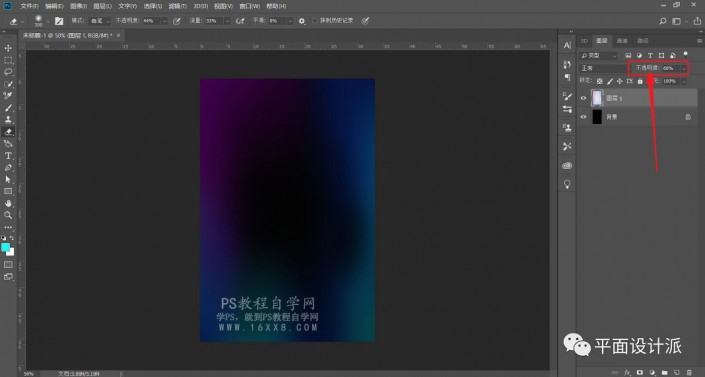
Import sculpture materials and convert them into smart objects. Select the Quick Selection Tool to roughly cut out the sculpture. For this kind of material with a clear background, the Quick Selection Tool is a good choice:

After getting the selection, click the Mask icon to add a mask to it, as shown in the figure:

Select the Brush Tool, change the foreground color to black, select the Flexible Brush, set the Opacity to 100% and fill it. For this tutorial, we will only use the statue’s head and beard. Use the brush tool, click on the mask of the statue material, and paint to remove the chest and neck areas:

Duplicate the statue material layer and hide the original material layer. We currently use duplicated material layers. You first make sure you select the smart object and not the layer mask thumbnail.
Because the wind effect only affects from side to side, not from top to bottom, ctrl+t rotates the material 90 degrees:

Go to Filter – Stylize – Wind. In the wind selection window, select Hurricane, right.
We need to use this effect many times. You can press alt+ctrl+f to repeat the effect of the previous step. You can repeat this effect multiple times, I repeated it 15 times:
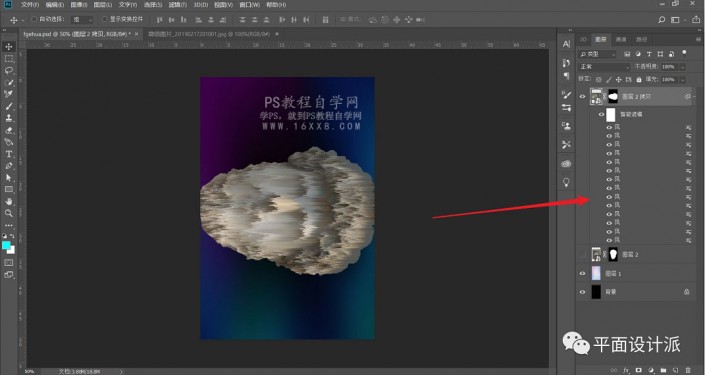
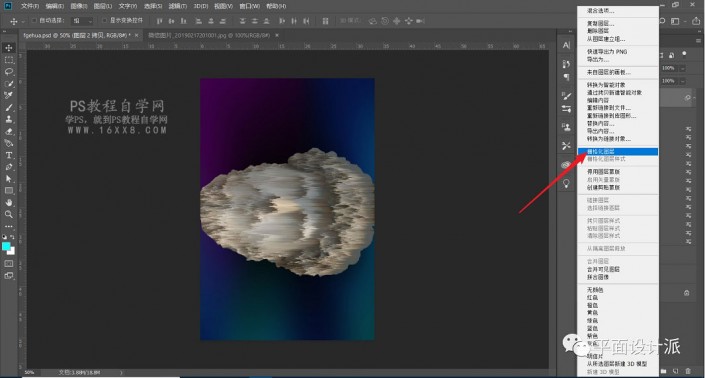
We need to rasterize the layer before rotating it back to its original position. If we ignore this part, the system will reapply the image in its original place.
Right clickSelect the rasterized layer on the �� layer and select it back:
Now we display the original material layer, select the flexible brush, set the foreground color to black, reduce the opacity and fill appropriately, and click to copy the mask of the material layer:

Use X to change the foreground color, press the [key to reduce the brush size, and the ] key to enlarge the brush size. As shown in the figure, apply the copied material layer mask to reveal the original layer below:
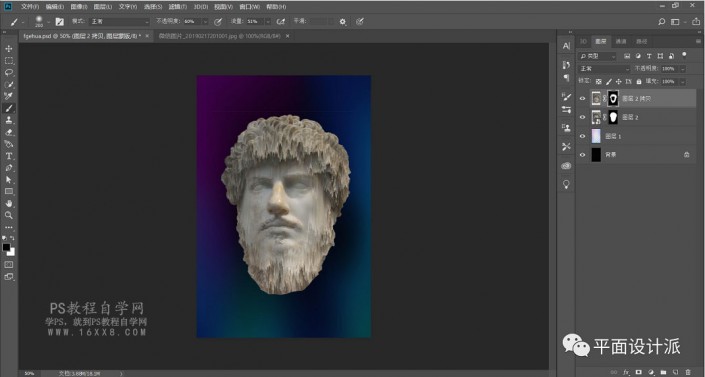
Select two material layers and group them.

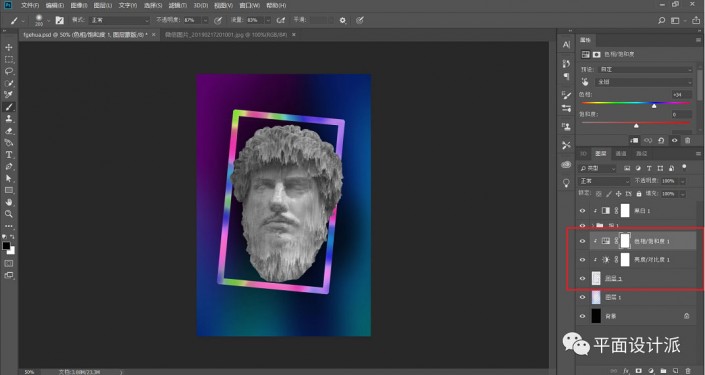
Now we need to remove the color from the image, we will add a black and white layer. Use the Properties panel to adjust the color. I set red to 255 and yellow to -32, which works better:

Add a blank layer below the sculpture layer and draw an “irregular” rectangular border. The method is very simple, so I won’t go into details:

Add color:
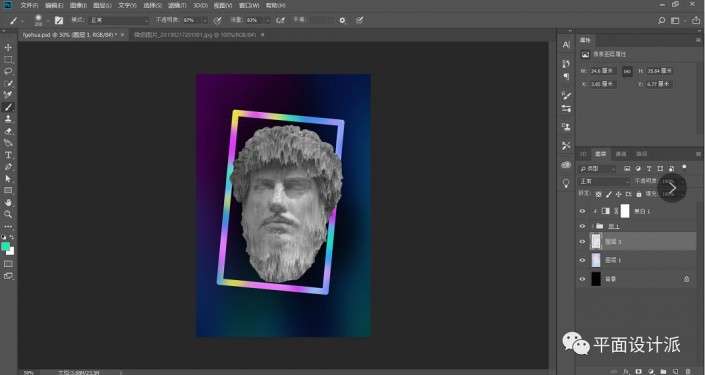
Adjust the color appropriately:
Code the words above and arrange the bottom version:

Add a black fill layer on top of the layer, execute Filter-Noise-Add Noise, and set it as shown below:

I added a mosaic effect to the eyes, and it felt pretty good:
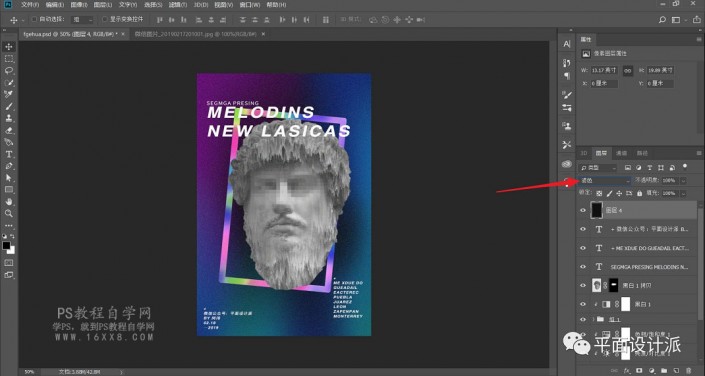
Finally, import the prototype and produce the rendering:
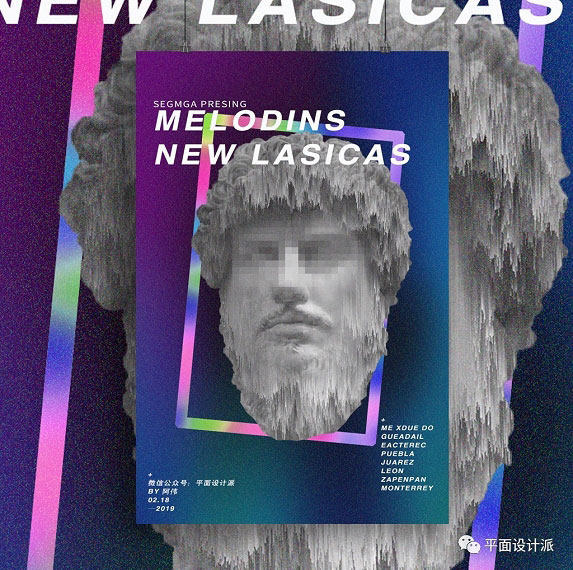
The poster is finished now. It’s better to practice it than to watch it, so let’s practice it.
This tutorial uses PS to create European and American sculpture posters. Poster production is relatively simple. As long as you study the tutorial carefully, you can still complete it well. One of the more critical steps is to use the filter to stylize the wind, hurricane type, etc. To achieve that kind of quicksand effect, students still need to do the specific tutorials in person. The tutorials sometimes look complicated, but in fact, you will feel it as long as you practice them.It’s still very simple, let’s learn it together.
Rendering:

Tutorial material: http://www.16xx8.com/photoshop/sucai/2019/u270928.html
Operation steps:
Open Photoshop and create a new canvas of suitable size. Fill with black background:

www.16xx8.com
Create a blank layer and select the Flexible Brush Tool. Change the foreground color to pink, paint the edges as shown in the picture, repeat this step and paint with blue and cyan:

Execute Filter – Blur – Dynamic Blur, the parameters are as shown below:

And on the Layers panel, lower the Opacity to 50%:

Import sculpture materials and convert them into smart objects. Select the Quick Selection Tool to roughly cut out the sculpture. For this kind of material with a clear background, the Quick Selection Tool is a good choice:

After getting the selection, click the Mask icon to add a mask to it, as shown in the figure:

Select the Brush Tool, change the foreground color to black, select the Flexible Brush, set the Opacity to 100% and fill it. For this tutorial, we will only use the statue’s head and beard. Use the brush tool, click on the mask of the statue material, and paint to remove the chest and neck areas:

Duplicate the statue material layer and hide the original material layer. We currently use duplicated material layers. You first make sure you select the smart object and not the layer mask thumbnail.
Because the wind effect only affects from side to side, not from top to bottom, ctrl+t rotates the material 90 degrees:

Go to Filter – Stylize – Wind. In the wind selection window, select Hurricane, right.
We need to use this effect many times. You can press alt+ctrl+f to repeat the effect of the previous step. You can repeat this effect multiple times, I repeated it 15 times:

We need to rasterize the layer before rotating it back to its original position. If we ignore this part, the system will reapply the image in its original place.
Right-click on the layer, select Rasterize Layer, and select Back:

Now we display the original material layer, select the flexible brush, and set the foreground colorSet it to black, reduce the opacity and fill appropriately, and click to copy the mask of the material layer:

Use X to change the foreground color, press the [key to reduce the brush size, and the ] key to enlarge the brush size. As shown in the figure, apply the copied material layer mask to reveal the original layer below:

Select two material layers and group them.

Now we need to remove the color from the image, we will add a black and white layer. Use the Properties panel to adjust the color. I set red to 255 and yellow to -32, which works better:

Add a blank layer below the sculpture layer and draw an “irregular” rectangular border. The method is very simple, so I won’t go into details:

Add color:

Adjust the color appropriately:

Code the words above and arrange the bottom version:

Add a black fill layer on top of the layer, execute Filter-Noise-Add Noise, and set it as shown below:

I added a mosaic effect to the eyes, and it felt pretty good:

Finally, import the prototype and produce the rendering:

The poster is finished now. It’s better to practice it than to watch it, so let’s practice it.

 微信扫一扫打赏
 支付宝扫一扫打赏

