<pThis tutorial is an English translation tutorial. Friends who are not proficient in software operation should try it with caution. Please forgive me for any deficiencies in translation or typos. If students can complete the entire tutorial, it will be quite cool. This kind of tutorial There are also tutorial websites that can be used for reference. There are many students who are good at learning. I believe you can make better ones. Let’s learn together.
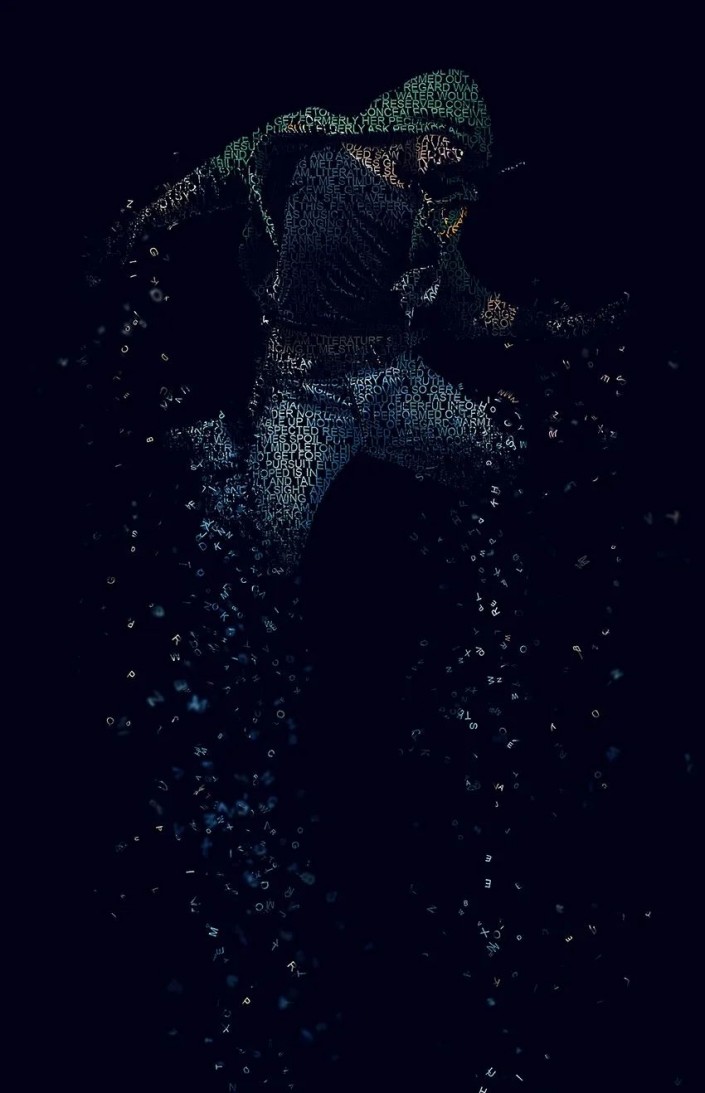 To learn PS, please go to www.16xx8.com
1. Create documents
step 1
First, open the photo you want to use. To open your photo, go to File > Open, select your photo, and click Open. Now, before we get started, just check a few things:
Your photo should be in RGB color mode, 8 bits/channel. To check, go to Image>Mode.
For best results, your photo size should be 1500–4000 pixels (width/height). To check, go to Image>Image Dimensions.
Your photo should be the background layer. If not, go to Layer > New > Background from Layer.

Step 2
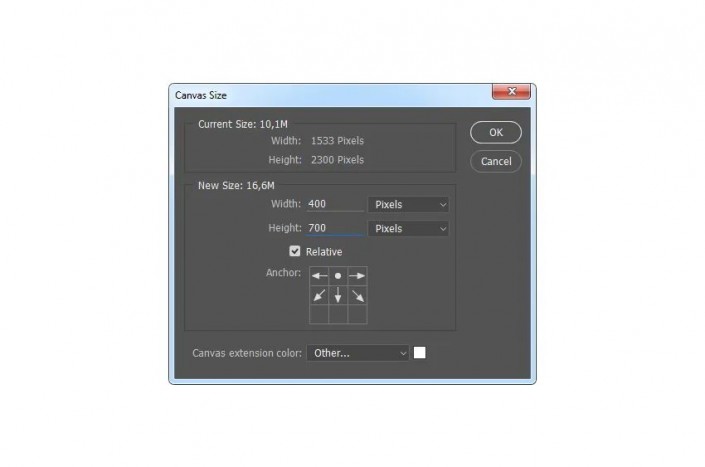
We are going to create a typography scatter effect in the downward direction, so we need to extend the canvas at the bottom to give more space for this effect, and some space on the left and right sides as well. Go to Image > Canvas Size and use the following settings:
Step 3
Now we need to make this expanded canvas area seamless. Select the Magic Wand Tool (W) and click once on the white area to select the entire white area we just added. Go to Edit > Fill and select the settings below. After that, press Ctrl-D on your keyboard to delete the selection.

2. Create patterns and brushes
step 1
In this section we will create the required patterns and brushes. Go to File > New to create a new file, name it Typography Pattern 1, and use the following settings:

Step 2
Now, select the Horizontal Font Tool (T), click anywhere within the canvas, and type a letter. You can use any font, font style and font size. I chose Arial font, Regular font style and 31.47 px size. After typing the letters, press the Enter key on your keyboard and then use the same method to add a few letters. This is what I get:

Step 3
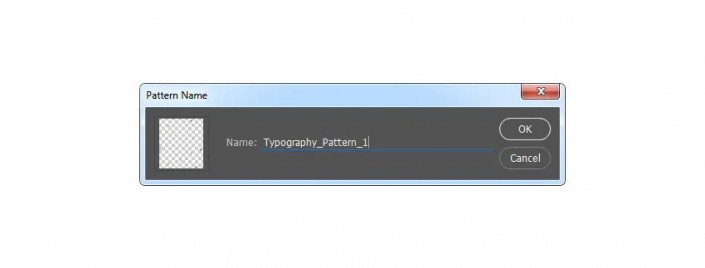
Now, click on the Background layer eye icon next to its thumbnail to hide it. Go to Edit > Define Pattern to define the pattern and name it Typography_Pattern_1. Keep this file open.
Step 4
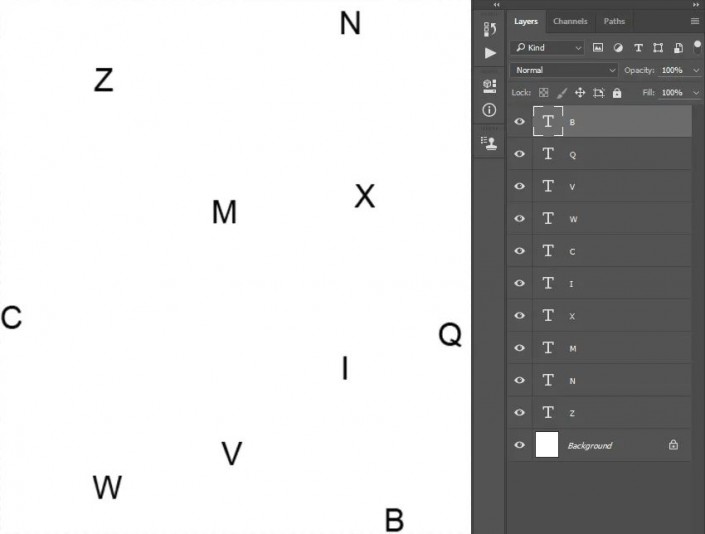
Repeat the first two steps in this section, but in step 1, name the new file Typography Pattern 2, and in step 2, use different letters with the same font, font style, and font size as the previous pattern. This is what I get:
Step 5
Now, click on the Background layer eye next to its thumbnail.�� icon to hide it. Go to Edit > Define Pattern to define the pattern and name it Typography_Pattern_2. Keep this file open.

Step 6
Repeat the first two steps in this section, but in step 1, name the new file Typography Pattern 3, and in step 2, use the same font, font style, and font size with different letters as in the first two patterns. This is what I get:

Step 7
Now, click on the Background layer eye icon next to its thumbnail to hide it. Go to Edit > Define Pattern to define the pattern and name it Typography_Pattern_3. Keep this file open.

Step 8
We are now going to create the brush. Select the Typography Pattern 1 document, go to Edit > Define Brush Preset, and name it Temp because we will delete this brush in the next few steps.
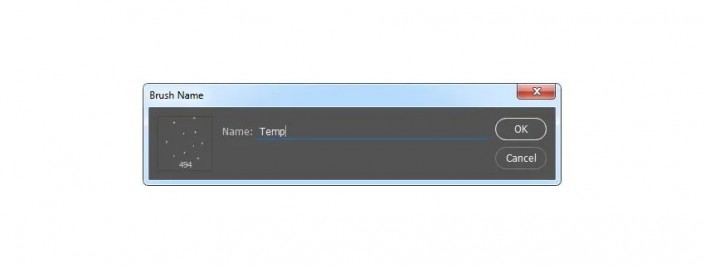
Step 9
Press B on your keyboard, right-click anywhere within the canvas, select the Temperature brush, and press Enter. Then go to Window > Brushes and use the following settings in the Brushes window:
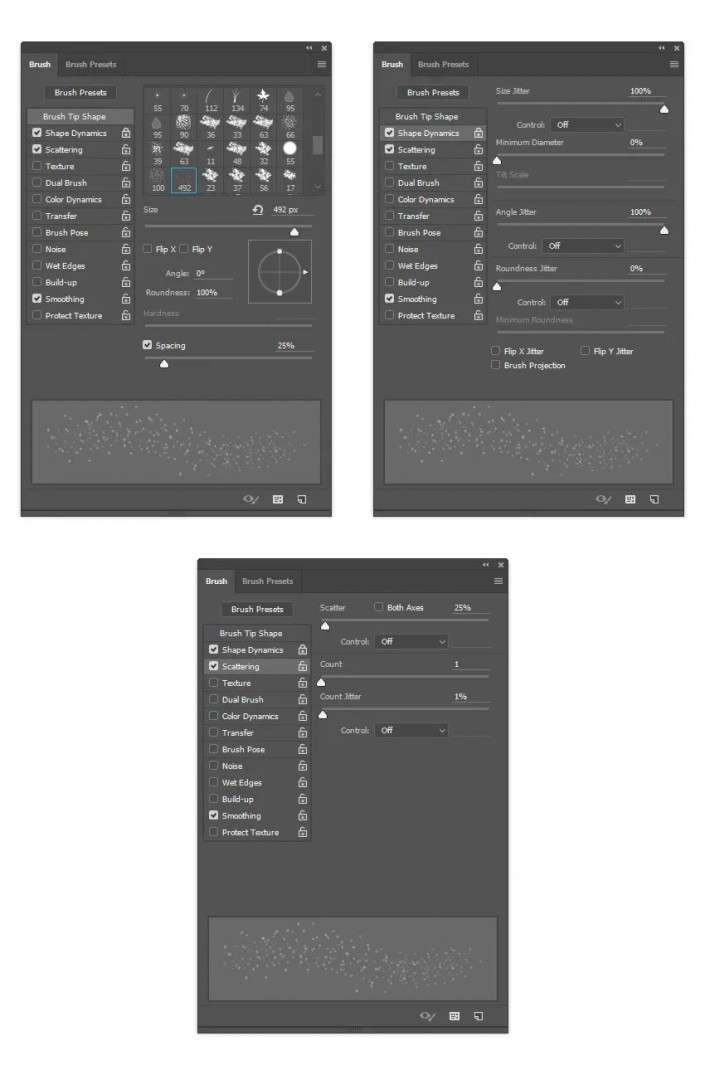
Step 10
Now we’ll define this brush as a new brush with the new settings. Go to Edit > Define Brush Preset and name it Typography_Brush_1. Press the B key on your keyboard, right-click anywhere within the canvas, then Alt-click the Temperature brush to delete it.

Step 11
Repeat all steps from step 8 to step 10 to create two brushes from the other two documents, Typography Pattern 2 and Typography Pattern 3. Of course, name the two new brushes according to their serial numbers. Then close all files except photo files.

3. Create a base map
step 1
Now we need to create a basis for determining which part of the photo will be converted into a layout. So the base is actually going to be our theme. Go to Layer > New > Layer to create a new layer and name it Base.
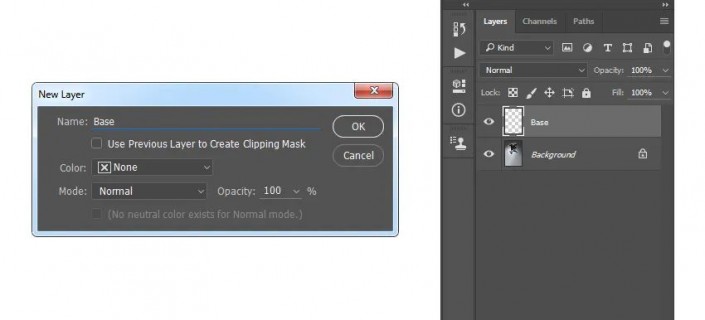
Step 2
With the Base layer selected, fill your theme with a color. You can do this in a number of ways. For example, you can use the Pen Tool (P), Magic Wand Tool (W), Lasso Tool (L), or another tool to create a selection of your subject, and then fill the selection with color only. Alternatively, you can select the Brush Tool (B) and use a stiff or soft-bristle brush to brush over the photo.
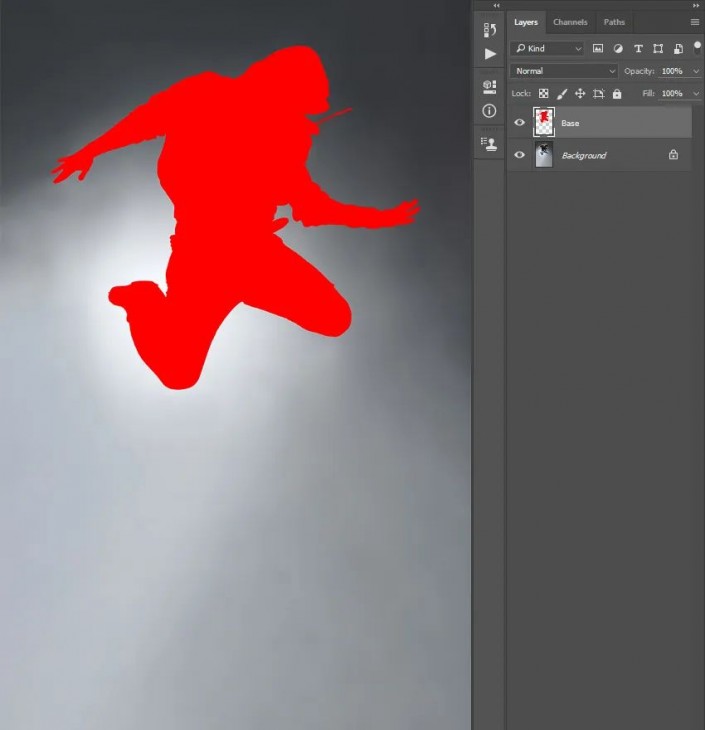
4. Fill in text
step 1
In this section, we will base��Create typographic effects with themes defined in the Base layer. Ctrl-click the Base Layer thumbnail to select that layer, select the Background layer, and go to Layer > New > Layer By Duplicate. Then hide the base layer by clicking the eye icon next to the thumbnail.
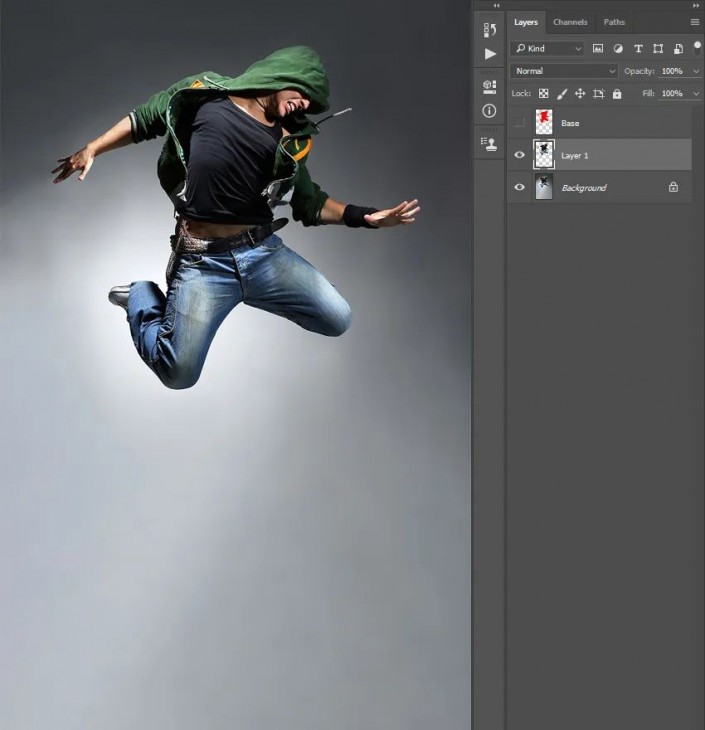
Step 2
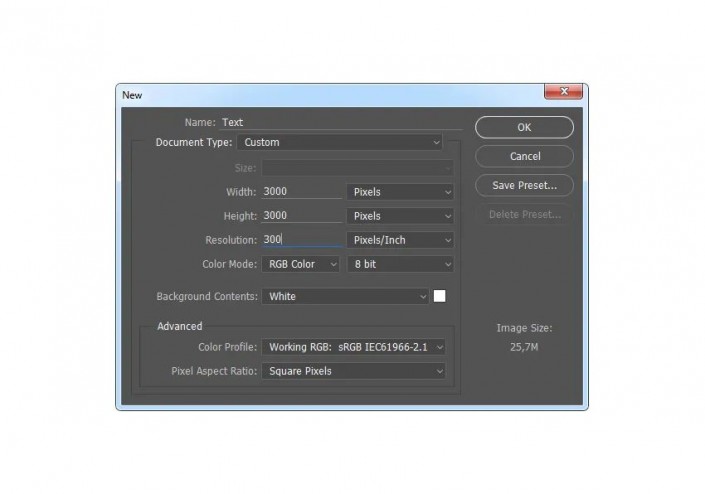
Now go to File > New to create a new file, name it Text and use the following settings. You can use different values for width/height, but make sure the document is at least as large as the photo document.
Step 3
Select the Horizontal Font Tool (T) and type the text so that it covers the entire document. You should use the same fonts and font styles that you use to create patterns and brushes. Also, the font size should be the same or very close.
Feel free to change the text, such as adding or subtracting leading, tracking, etc. If text content doesn’t matter to you, you can use a text generator to speed up the process.

Step 4
Now, select the Move Tool (V), click and hold within the canvas, then drag the text layer from the Text document to your photo document and place it so that it covers the entire subject. Double-click the layer name and rename it Text.

Step 5
Ctrl-click the Layer 1 thumbnail to select that layer, then go to Layers > Layer Mask http://www.16xx8.com/tags/38847/ “>”Show selection”.
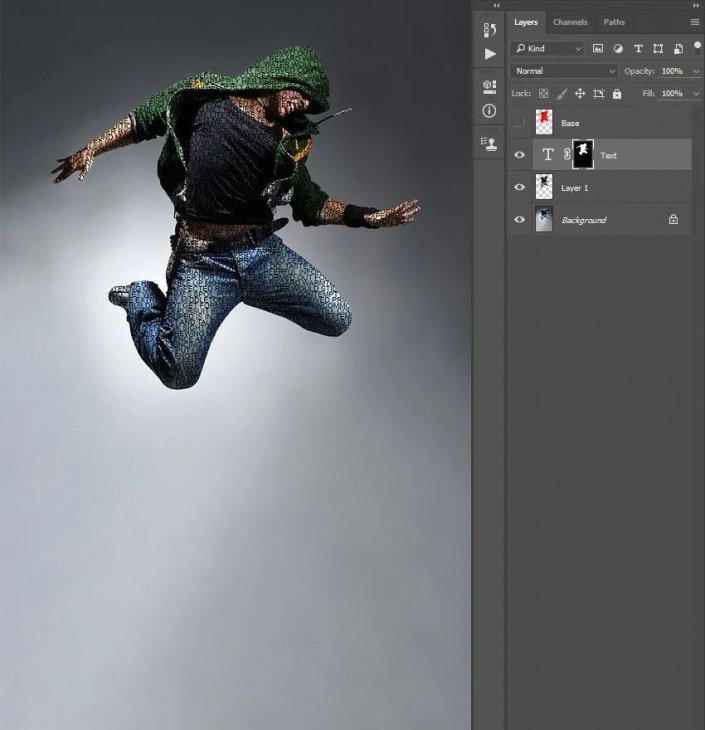
Step 6
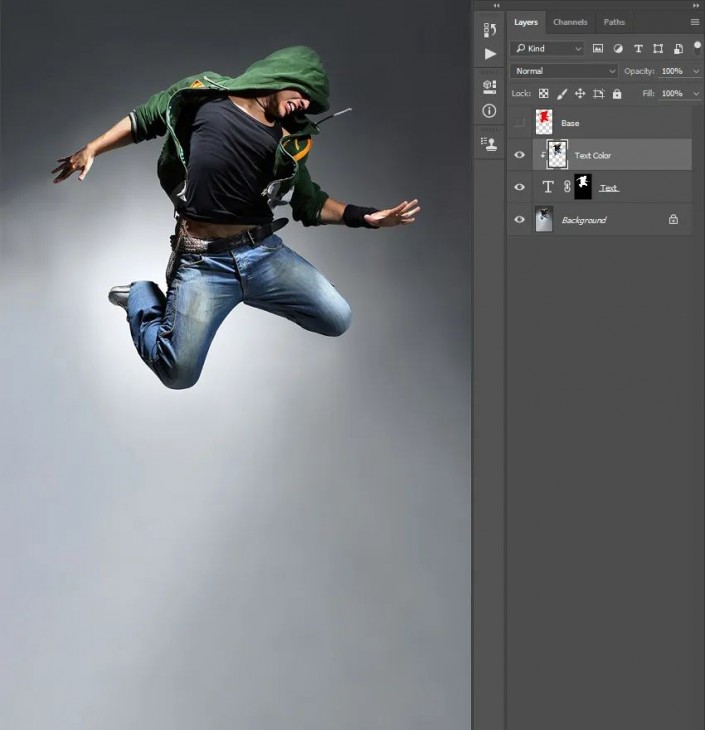
Now select Layer 1 and drag it above the Text layer. Then go to Layer > Create Clipping Mask http://www.16xx8.com/tags/38848/. Double-click the layer name and rename it Text Color.
Step 7
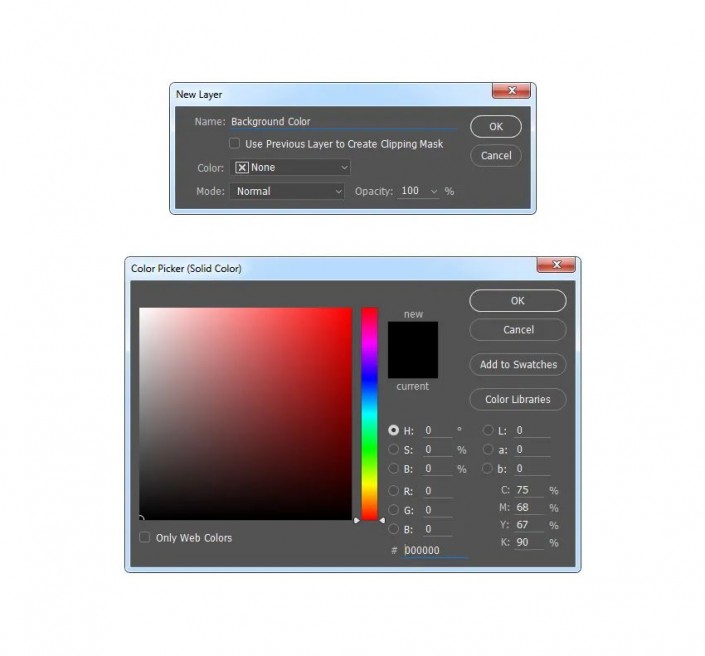
Now we will create a solid color background. Select the background layer and go to Layer > New Fill Layer > Solid Color Create a new solid color fill layer, name it Background Color, and use the following settings:
Step 8
Select the background layer and go to Layer > New > Duplicate layer by copy. Then drag this layer below the base layer, go to Filter > Blur > Gaussian Blur and use the following settings:

Step 9
Now go to File > Save As to save the document as a new file. You can name it whatever you want and save it anywhere, but remember that you’ll need to select the file later to apply the filter. Then right-click on the pair of background copy layers and select Delete Layer.

Step 10
I��The edges of the subject need to be slightly corrected. Select the layer mask of the Text layer, go to Select > Select and Mask, and use the following settings:

Step 11
Right-click on the Text layer name and select Convert to Smart Object http://www.16xx8.com/tags/34209/. Then go to Filter > Displacement, use the settings below, and select OK. After that, you will get another window where you can select the previously saved file and click on Open.

Step 12
Now we will group some layers. Select the Background Color layer, Shift-click the Text Color layer, go to Layer > New > Group From Layer to create a new group from these layers and group it Named “Theme Printing”.

5. Create Scattered Letters
step 1
In this section we will create letters and later distribute them. First, we need to create another base layer that will determine the areas to be dispersed. With the Base layer selected, go to Layer > New > Layer to create a new layer and name it Base 2.

Step 2
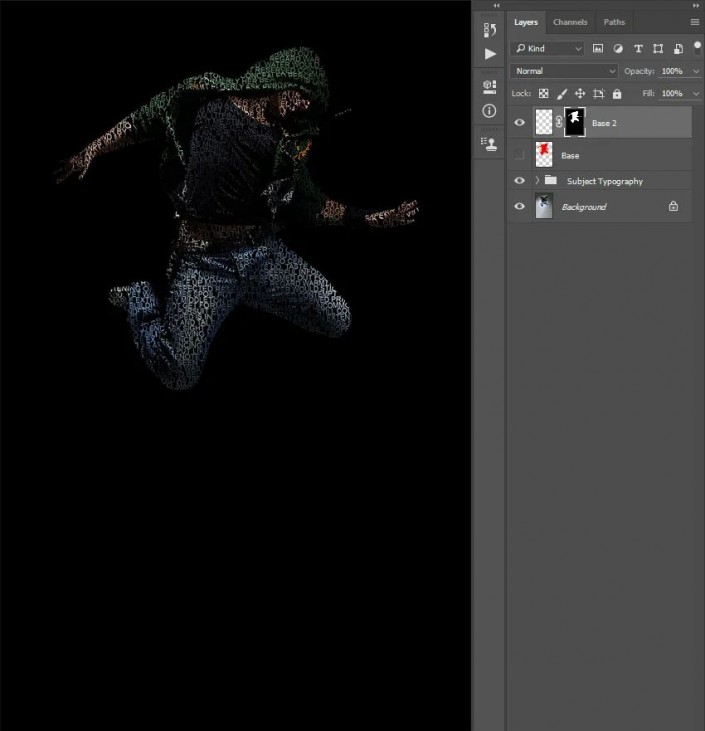
Ctrl-click the Base Layer thumbnail to select that layer, then go to Layer > Layer Mask > Show Selection.
Step 3
Now select the Base 2 layer thumbnail, select the Brush Tool (B), choose a soft or hard brush, and start brushing over the areas you want to scatter.

Step 4
Select the layer mask of the Base 2 layer, right-click on it and select Apply Layer Mask.

Step 5
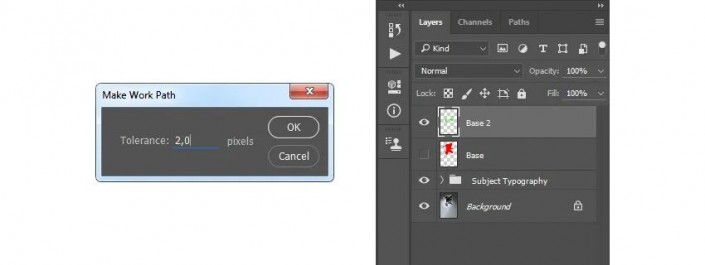
Control-click on the Base 2 layer thumbnail to select that layer. Select the Lasso Tool (L), right-click anywhere within the canvas, select Make Work Path, and use the following settings:
Step 6
Now, click on the eye icon next to the “Base 2” layer thumbnail to hide it. Select the Theme Typography group and go to Layer > New > Layer to create a new layer. Leave the default name “Layer 1” as we will be removing this layer in the next few steps.

Step 7
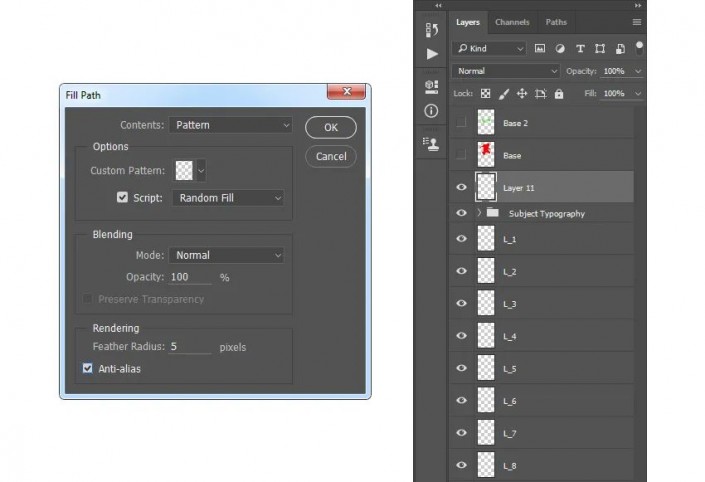
Select the Pen Tool (P), right-clickClick anywhere within the canvas, select Fill Work Path, and use the following settings:

Step 8
Now, Ctrl-click on the Layer 1 thumbnail to select that layer, select the Background layer and go to Layer > New > Duplicate Layer by Copy to create a new layer by copy , and name it L_1 (short for Letter_1). Then right click on layer 1 and select Delete Layer.

Step 9
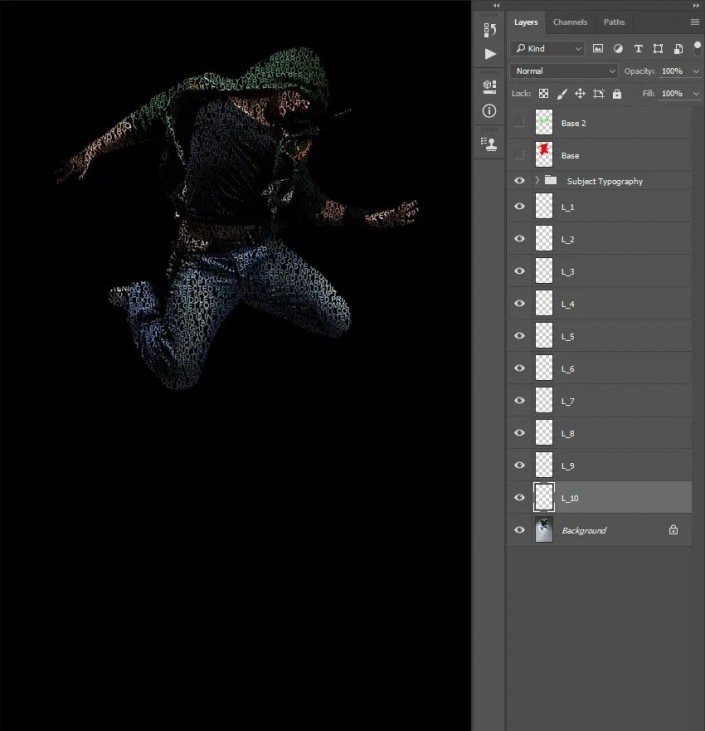
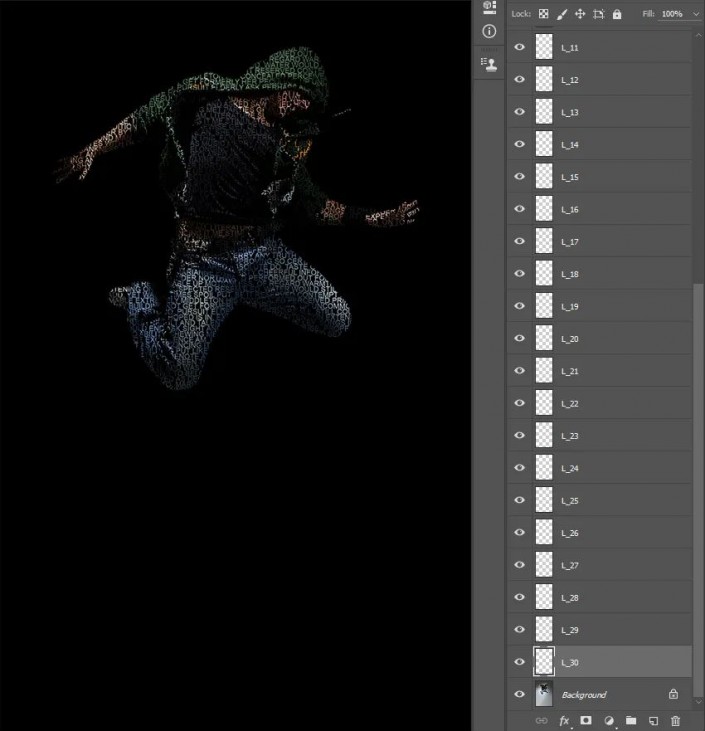
Now, repeat all steps from step 6 to step 8 as many letter layers as you need using Typography_Pattern_1. I’ve repeated this nine times, so I have ten letter layers in total.
Step 10
Now we will create more layers of letters, but in a different mode, so we will use different letters. Repeat all steps from step 6 to step 8, but in step 7, use the following settings instead of the settings you used last time.
Step 11
Now repeat your step 10 as many times as you need to create as many letter layers using Typography_Pattern_2. I’ve repeated this nine times, so I have a total of 20 letter layers.

Step 12
Now we’re going to use our last pattern to create more layers of letters, so we’re going to use different letters. Repeat all steps from step 6 to step 8, but in step 7, use the following settings instead of the settings you used last time.

Step 13
Now, create as many letter layers using Typography_Pattern_3 as you need, repeating step 12 as many times as you need. I’ve repeated this nine times, so I have a total of 30 letter layers.
Step 14
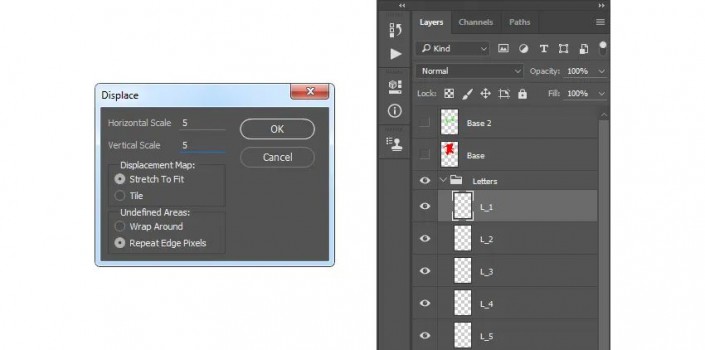
Now select the first letter layer, go to Filter > Displace, use the settings below and select OK. After that, you will get another window where you can select the previously saved file and click on Open.
Step 15
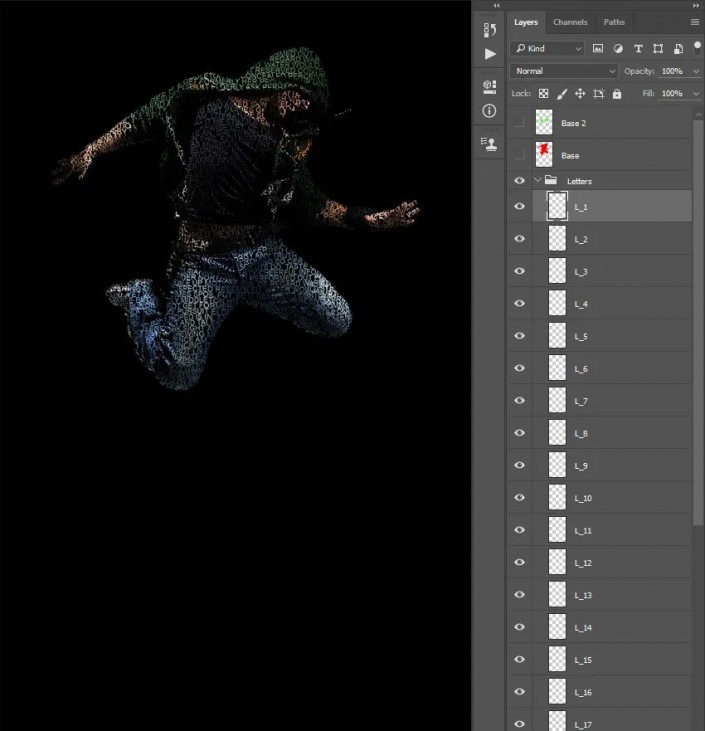
Select the next letter layer and press Ctrl-F to apply the previous filter with the same settings. Apply this filter to all other letter layers using the same method.
Step 16
Now we group all the letter layers. Select your top letter layer, then Shift-click the last letter layer to select all letter layers, then go to Layer > New > Group From Layer to select Create a new grouping on the layer and name it “Letters”. Then drag this group above the Theme Printing group.

6. Create scattered elements
step 1
In this section we will scatter the letters we just created. So, all you have to do now is select the Move Tool (V), select the letter layer you want to move, and move it in the direction of your choice. I wanted to create the spread in the downward direction and this is what I got:

Step 2
Now we’ll transform some letters to create depth. Select the letter layer you want to convert, pick the Lasso Tool (L), right-click anywhere within the canvas, and use the following settings:

Step 3
I’ve converted several letter layers. Feel free to transform as many layers as you like and use different values for width/height. This is what I get:

Step 4
Now, to give the effect more depth and focus, we’ll blur some of the letters. Select the letter layer you want to blur, go to Filter > Blur > Gaussian Blur and use the following settings:

Step 5
I blurred a few more letter layers. Feel free to transform as many layers as you like and use different values for Gaussian Blur. This is what I get:
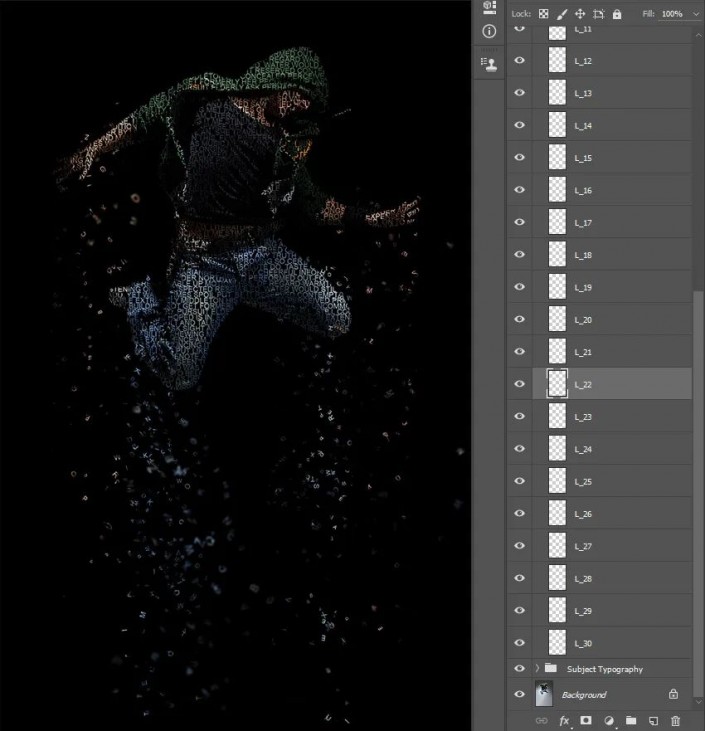
Step 6
Now make some final changes to the scattered letters so that you can move, transform and blur the letter layer as you please. You can also move or transform the entire Letters group at will, and you can change the layer order in the Layers panel. This is what I get:

7. Create missing letters effect
step 1
In this section we will create the effect of missing letters. Select the Text layer and go to Layer > Layer Mask > Reveal All to add a blank layer mask to this layer.

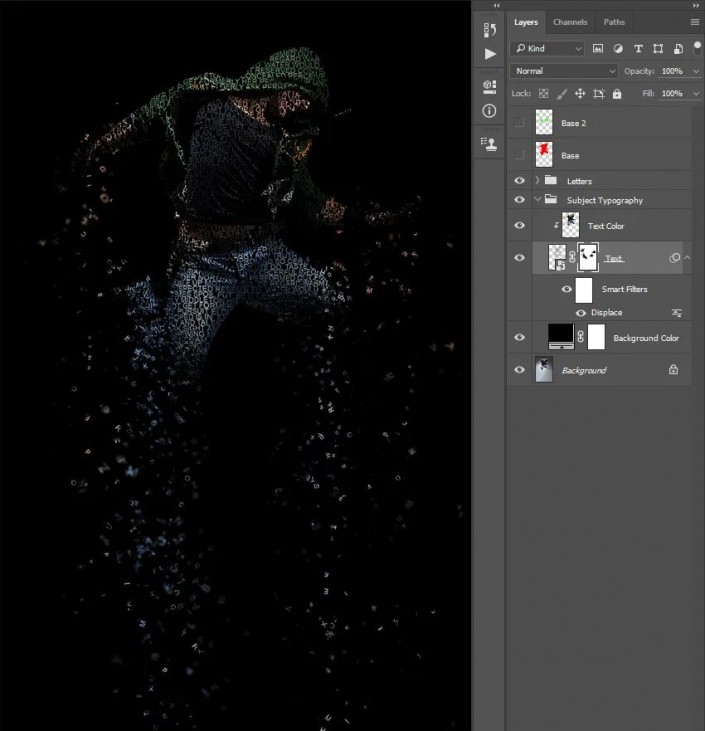
Step 2
Select the layer mask of the Text layer and press D on your keyboard to reset the swatches. Select the Brush Tool (B), right-click anywhere within the canvas, select some of the font brushes we created at the beginning of the tutorial, and press Enter. Then start brushing over the areas where you want to create the missing letter effect. You can also use a soft brush for the edges. This is what I get:
8.Adjustment
step 1
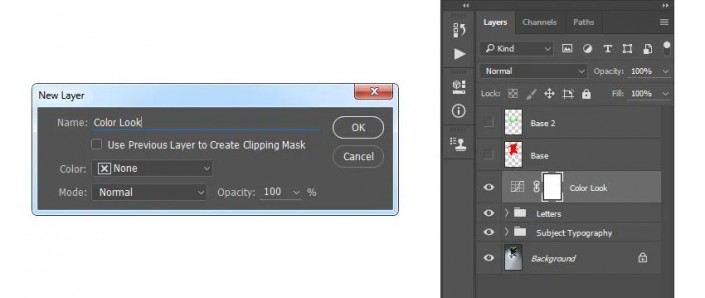
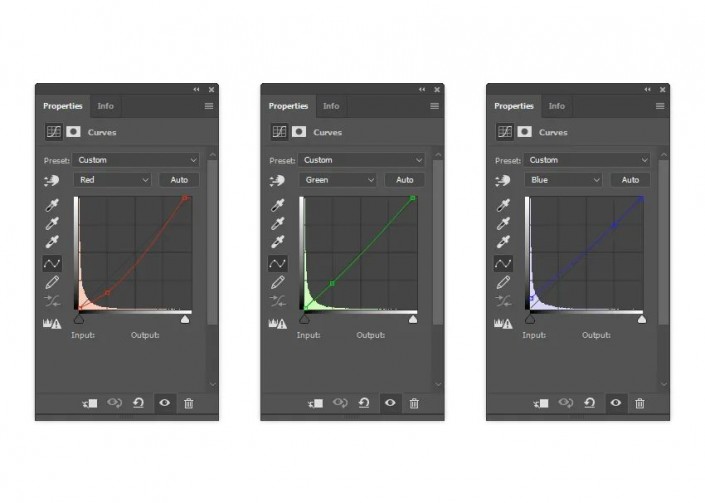
In this section we’ll make the final adjustments to the effect. First, we’ll add a nice color look. So select the Letters group, then the Curves adjustment layer, and name it Color Look.
Step 2
�Now, double-click the Color Appearance layer thumbnail and use the following settings:
Step 3
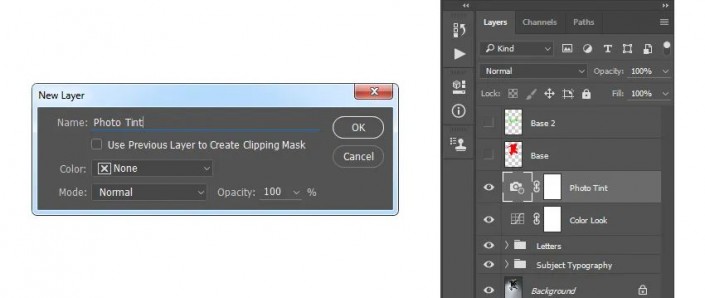
Now we’ll add a subtle filter. Go to Layer > New Adjustment Layer > Photo Filter to create a new Photo Filter adjustment layer and name it Photo Tint.
Step 4
Double-click the Photo Tint layer thumbnail and use the following settings:

Step 5
Now we’ll add subtle contrast. Press D on your keyboard to reset the swatches, go to Layer > New Adjustment Layer > Gradient Map to create a new Gradient Map adjustment layer and name it Overall Contrast.

Step 6
Change the Blending Mode to Soft Light and drop the Opacity to 8%.

Step 7
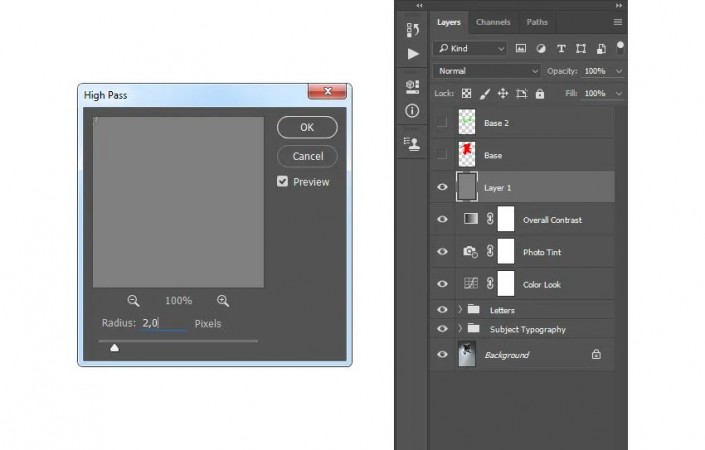
Finally, we’ll add a sharpening effect to the entire effect. Press Ctrl-Alt-Shift-E on your keyboard to take a snapshot, then go to Filters > Other > Qualcomm and use the following settings:
Step 8
Double-click on the layer 1 name and rename it to Overall Sharpen. Change its Blending Mode to Hard Light and lower the Opacity to 82%. Recommended: PS basic core functions (video tutorial)

Finish:
 To learn PS, please go to www.16xx8.com
Follow along and practice, you can challenge yourself.

 微信扫一扫打赏
 支付宝扫一扫打赏

