Author:Sweetwitch Source:PConline
This Photoshop example mouse painting is a refreshing bottle of Olay toner. It mainly uses the rounded rectangle tool, gradient, burn and blur tools and transformation tools. The operation is simple and practical, and it is more suitable. Let’s practice the basic operations of PS mouse painting.
First look at the figure :
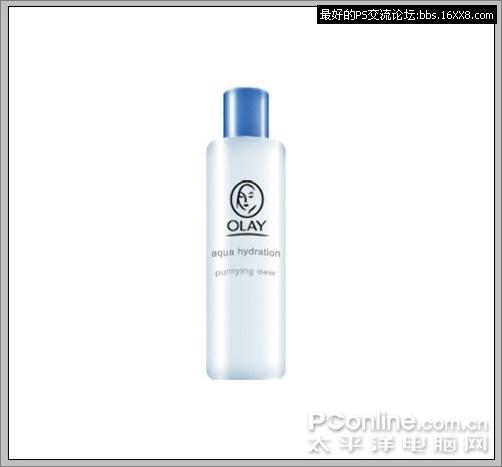
Figure 1
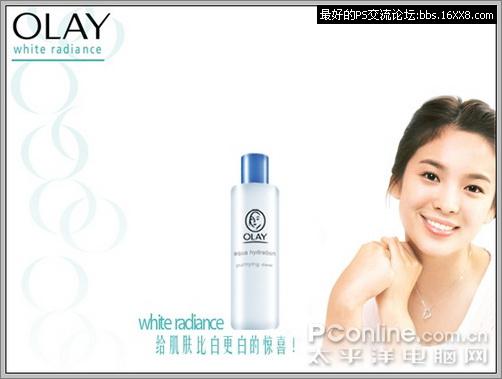
Figure 2
Production steps:
1. Create a new file with a white background, select the rounded rectangle tool, set the corner radius to 8 pixels, and draw the shape of the bottle.
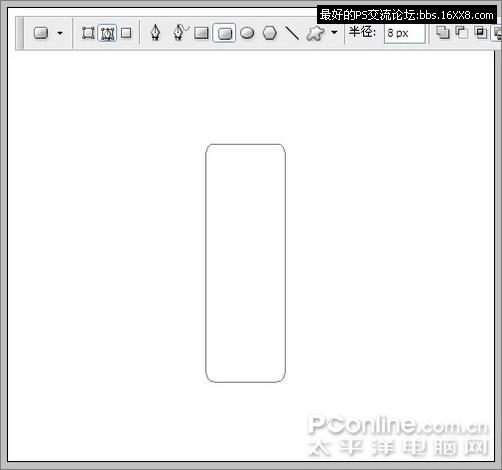
Figure 3
2. Create a new layer and name it “Bottle”. Select the gradient tool, set the mode to linear, and set the gradient as follows, where the blue colors are R: 208 G: 222 B: 232.
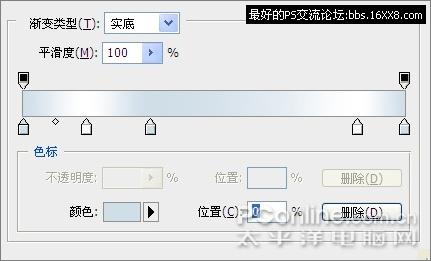
Figure 4
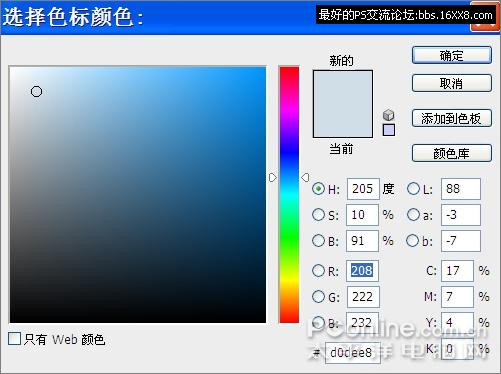
Figure 5
.Bvg315 { display:none; }
3. After Ctrl+Enter turns the path into a selection, drag a gradient from left to right in the selection, and Ctrl+D to cancel the selection.
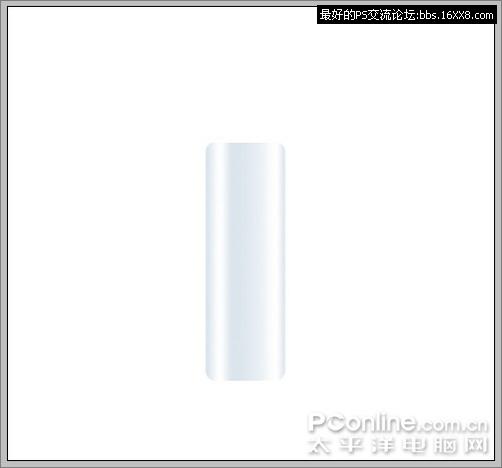
Figure 6
4. Select Menu/Edit/Transform/Deform, and pull the top of the bottle upward a little to make it arc-shaped.
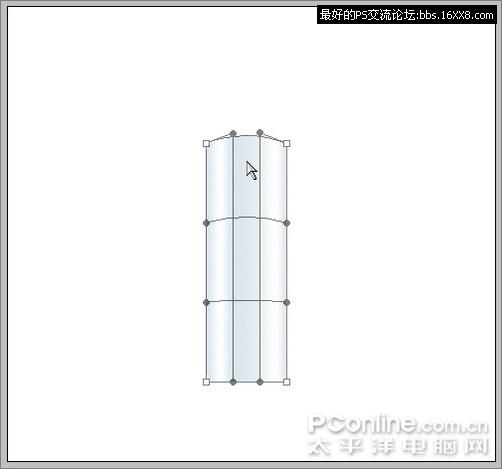
Figure 7
5. After adjustment, press Enter to confirm. The effect is as follows.
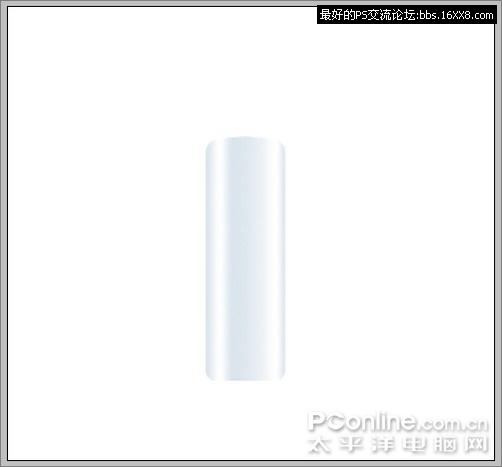
Figure 8
6. Select the deepen tool and set it as follows to deepen the top, bottom and sides of the bottle to give it a three-dimensional feel.
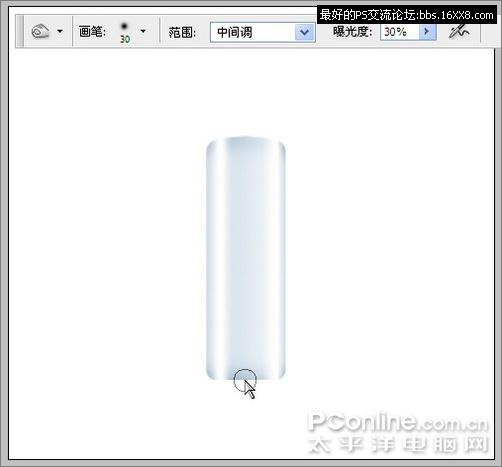
Figure 9
7. At this time, some parts of the top and bottom of the bottle are too white, like gaps, so select the smudge tool and set it as follows. Apply the darker parts of the top and bottom to both sides to blend them out.
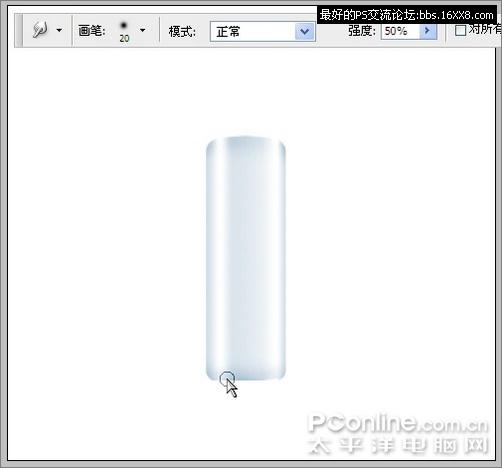
Figure 10
8. Select the blur tool and set it as follows. Apply it from top to bottom on the two highlights of the bottle to make it look softer and more natural, and complete the bottle.
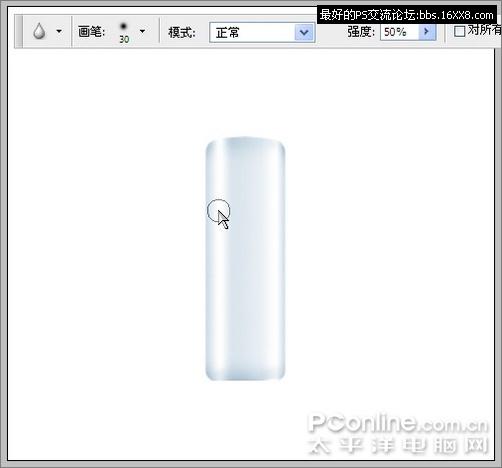
Figure 11
.Cqq651 { display:none; }
9. Create a new layer, name it “Bottle Cap”, and place it under the “Bottle Body” layer. Select the Rounded Rectangle Tool, set the corner radius to 5, and draw a small rectangle on the top of the bottle.
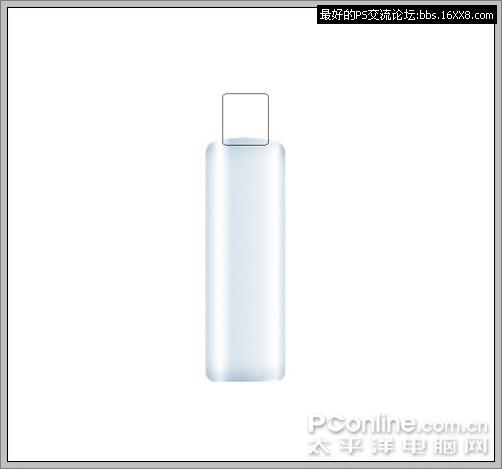
Figure 12
10. Select the gradient tool, set the mode to linear, and set the gradient as follows, where the blue color is R: 76 G: 141 B: 203.
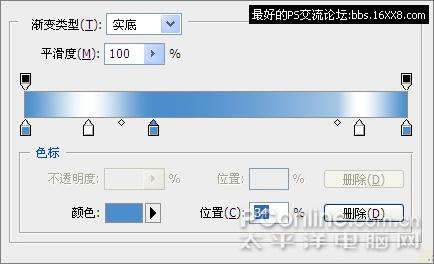
Figure 13
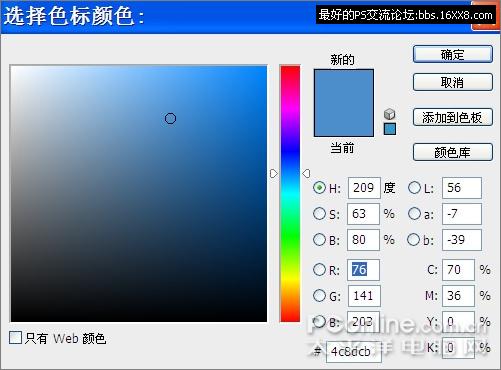
Figure 14
11. Ctrl+Enter to convert the path to a selection, drag a gradient from left to right in the selection and cancel the selection.
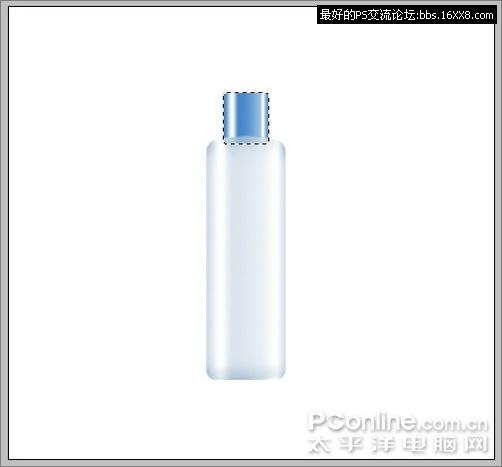
Figure 15
12. Similarly, execute Menu/Edit/Transform/Deform, and pull the top of the bottle cap upward a little to make it arc-shaped.
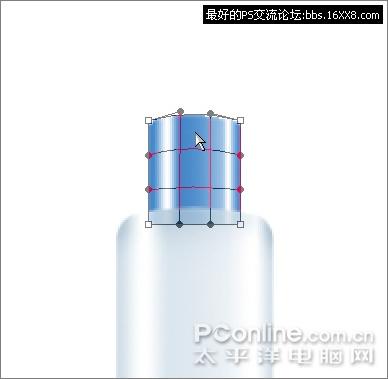
Figure 16
13. The effect at this time is as follows, the bottle cap and the bottle body overlap. Click the bottle layer in the layer panel to load the selection, select the bottle cap layer, and press Delete to delete it.
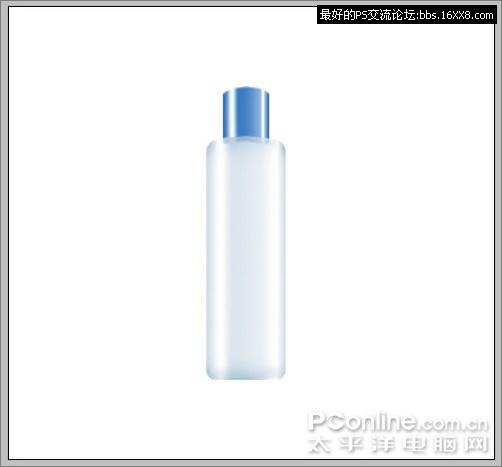
Figure 17
.Cxe859 { display:none; }
14. Select the deepening tool again and apply and deepen the place where the bottle cap and bottle body are combined.
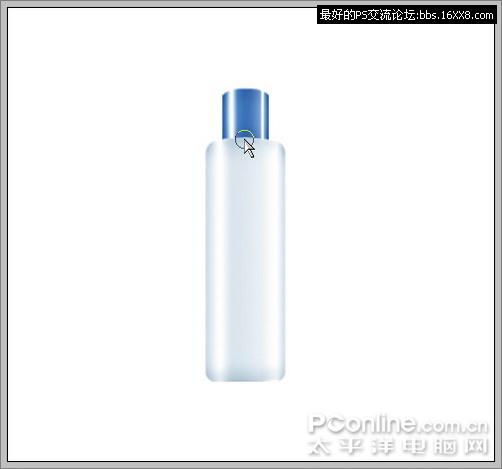
Figure 18
15. Select the smudge tool and set it as follows. Just as you did with the bottle, apply the darker areas on the top and bottom of the bottle cap to blend them out.
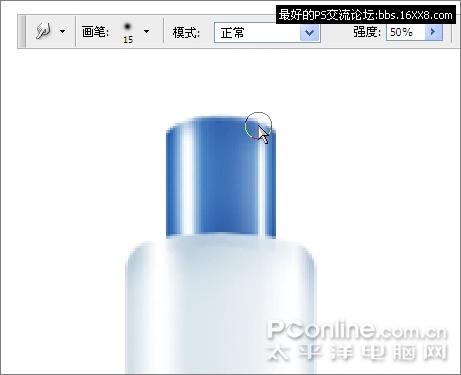
Figure 19
16. Select the blur tool and set it as follows. Apply it from top to bottom on the two highlights of the bottle cap to make it look softer and more natural, and complete the bottle cap.
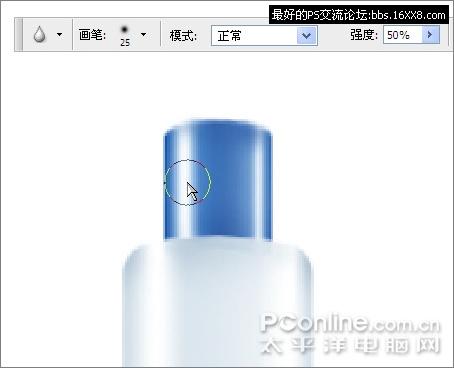
Figure 20
.Nwf491 { display:none; }
17. Open a picture of the Olay logo.
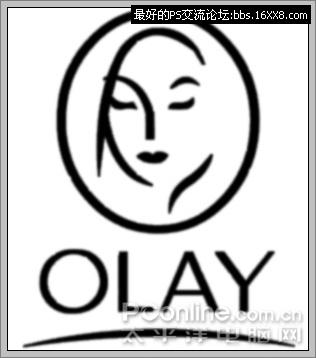
Figure 21
18. Use the magic wand tool to click on the black line, and then select Menu/Select/Select Similar to select the entire black icon.
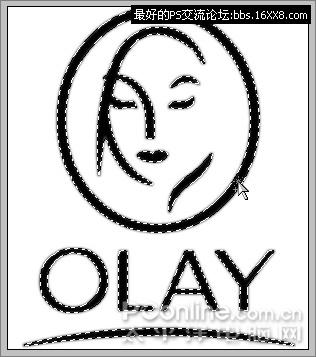
Figure 22
19. Use the move tool to drag the icon into the bottle file, and Ctrl+T to adjust it to the appropriate size and position.
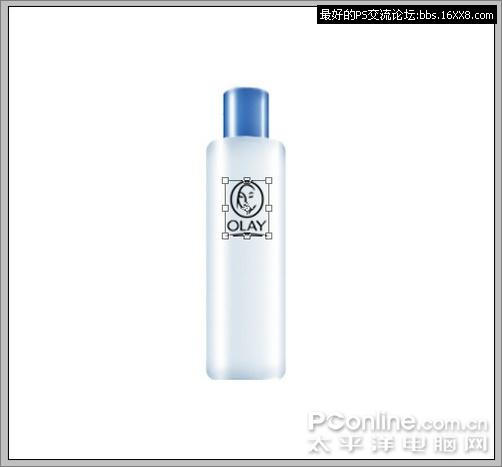
Figure 23
20. Use the text tool to type two rows of text and place them at the following locations on the bottle.

Figure 24
21. Right-click the text layer in the layer panel and select “Rasterize Text”, then select Menu/Edit/Transform/Transform, and adjust the two rows of text into upward arcs to form a cylindrical bottle printed on it. on the effect.
Figure 25
22. Such a realistic bottle of Olay toner is completed. Now let’s put it into an Olay advertisement to make it look real.
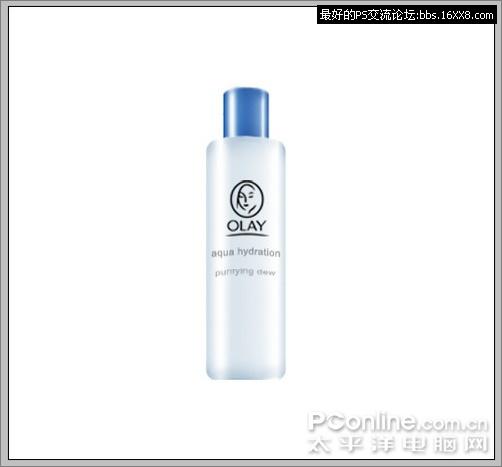
Figure 26
.Tnz649 { display:none; }
23. Open a picture of the beauty Song Hye Kyo’s Olay advertisement.
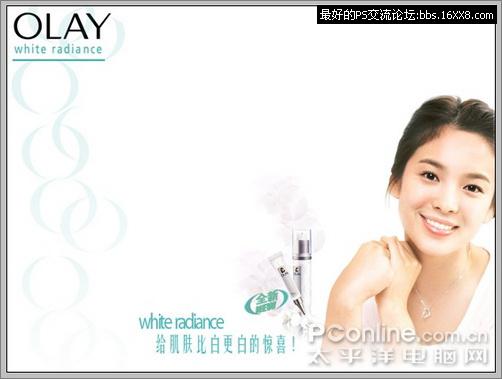
Figure 27
24. Select the brush tool, set it as follows, set the color to white, and erase the original Olay product on the picture.
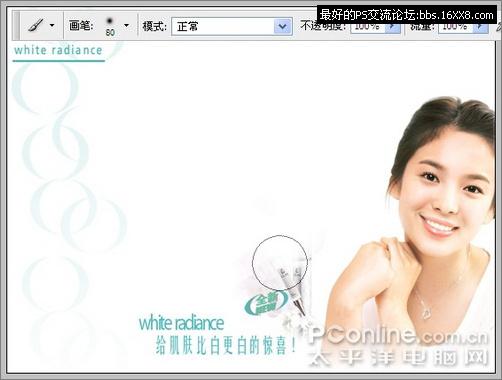
Figure 28
25. Combine the layers of our toner and drag them into the advertising image with the move tool. Ctrl+T adjust it to the appropriate size and position, and you’re done.
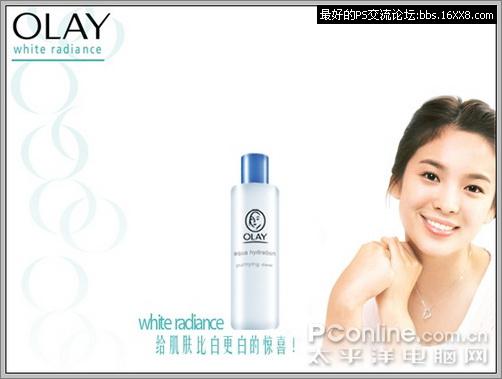
Final renderings
Author:Sweetwitch Source:PConline
This Photoshop example mouse painting is a refreshing bottle of Olay toner. It mainly uses the rounded rectangle tool, gradient, burn and blur tools and transformation tools. The operation is simple and practical, and it is more suitable. Let’s practice the basic operations of PS mouse painting.
First look at the figure :

Figure 1

Figure 2
Production steps:
1. Create a new file with a white background, select the rounded rectangle tool, set the corner radius to 8 pixels, and draw the shape of the bottle.

Figure 3
2. Create a new layer and name it “Bottle”. Select the gradient tool, set the mode to linear, and set the gradient as follows, where the blue colors are R: 208 G: 222 B: 232.

Figure 4

Figure 5
.Bvg315 { display:none; }
3. After Ctrl+Enter turns the path into a selection, drag a gradient from left to right in the selection, and Ctrl+D to cancel the selection.

Figure 6
4. Select Menu/Edit/Transform/Deform, and pull the top of the bottle upward a little to make it arc-shaped.

Figure 7
5. After adjustment, press Enter to confirm. The effect is as follows.

Figure 8
6. Select the burn tool.��The settings are as follows, deepen the top, bottom and sides of the bottle to make the bottle initially look three-dimensional.

Figure 9
7. At this time, some parts of the top and bottom of the bottle are too white, like gaps, so select the smudge tool and set it as follows. Apply the darker parts of the top and bottom to both sides to blend them out.

Figure 10
8. Select the blur tool and set it as follows. Apply it from top to bottom on the two highlights of the bottle to make it look softer and more natural, and complete the bottle.

Figure 11
.Cqq651 { display:none; }
9. Create a new layer, name it “Bottle Cap”, and place it under the “Bottle Body” layer. Select the Rounded Rectangle Tool, set the corner radius to 5, and draw a small rectangle on the top of the bottle.

Figure 12
10. Select the gradient tool, set the mode to linear, and set the gradient as follows, where the blue color is R: 76 G: 141 B: 203.

Figure 13

Figure 14
11. Ctrl+Enter to convert the path to a selection, drag a gradient from left to right in the selection and cancel the selection.

Figure 15
12. Similarly, execute Menu/Edit/Transform/Deform, and pull the top of the bottle cap upward a little to make it arc-shaped.

Figure 16
13. The effect at this time is as follows, the bottle cap and the bottle body overlap. Click the bottle layer in the layer panel to load the selection, select the bottle cap layer, and press Delete to delete it.

Figure 17
.Cxe859 { display:none; }
14. Select the deepening tool again and apply and deepen the place where the bottle cap and bottle body are combined.

Figure 18
15. Select the smudge tool and set it as follows. Just as you did with the bottle, apply the darker areas on the top and bottom of the bottle cap to blend them out.

Figure 19
16. Select the blur tool and set it as follows. Apply it from top to bottom on the two highlights of the bottle cap to make it look softer and more natural, and complete the bottle cap.

Figure 20
.Nwf491 { display:none; }
17. Open a picture of the Olay logo.

Figure 21
18. Use the magic wand tool to click on the black line, and then select Menu/Select/Select Similar to select the entire black icon.

Figure 22
19. Use the move tool to drag the icon into the bottle file, and Ctrl+T to adjust it to the appropriate size and position.

Figure 23
20. Use the text tool to type two rows of text and place them at the following locations on the bottle.

Figure 24
21. Right-click the text layer in the layer panel and select “Rasterize Text”, then select Menu/Edit/Transform/Transform, and adjust the two rows of text into upward arcs to form a cylindrical bottle printed on it. on the effect.
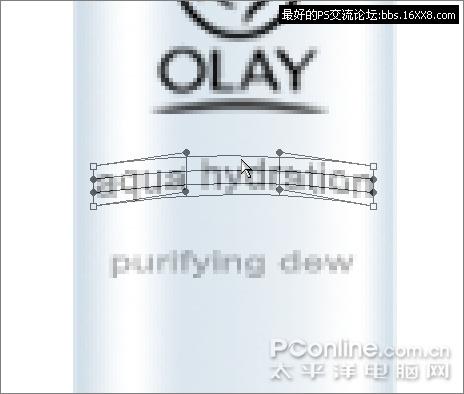
Figure 25
22. Such a realistic bottle of Olay toner is completed. Now let’s put it into an Olay advertisement to make it look real.

Figure 26
.Tnz649 { display:none; }
23. Open a picture of the beauty Song Hye Kyo’s Olay advertisement.

Figure 27
24. Select the brush tool, set it as follows, set the color to white, and erase the original Olay product on the picture.

Figure 28
25. Combine the layers of our toner and drag them into the advertising image with the move tool. Ctrl+T adjust it to the appropriate size and position, and you’re done.

Final renderings
<!–Collectio

 微信扫一扫打赏
 支付宝扫一扫打赏

