

Original image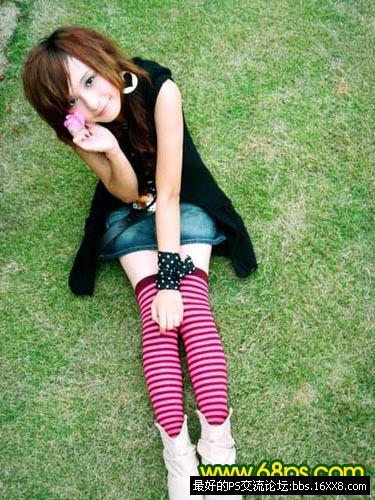
Final effect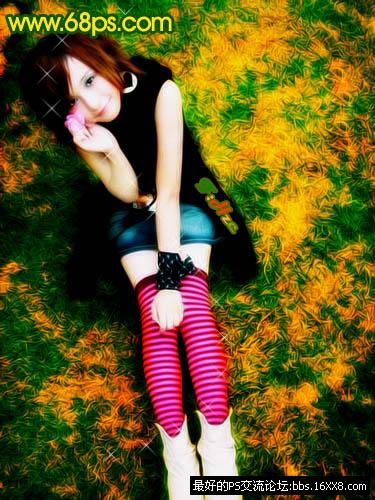
1. CTRL+J copies a layer and operates on the copied layer!
2. Create a curve adjustment layer and set the parameters as shown in Figure 1-3. 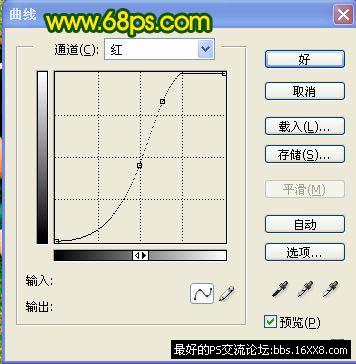
Figure 1 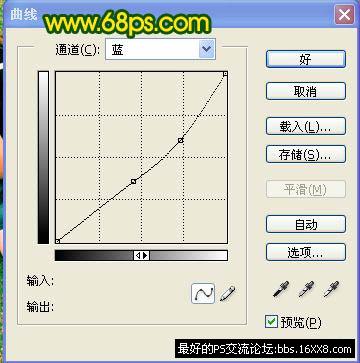
Figure 2 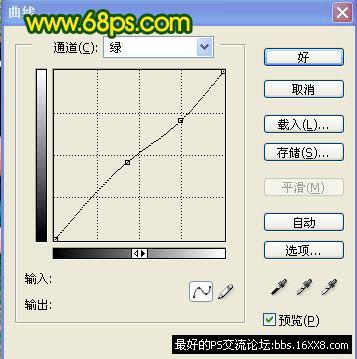
Figure 3
3. Use a black paintbrush to erase the character part, the effect is as shown in Figure 4. 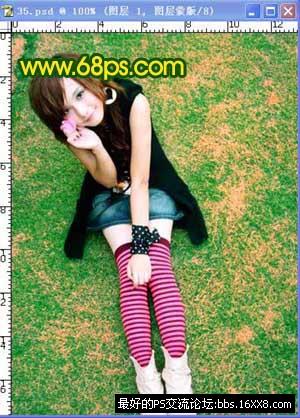
Figure 4
4. Create a new layer, press Ctrl + Alt + Shift + E to stamp the layer, execute: Filter-Blur-Gaussian Blur, set the value to 3 and set the layer blending mode to Soft Light. The effect is as shown in Figure 5. 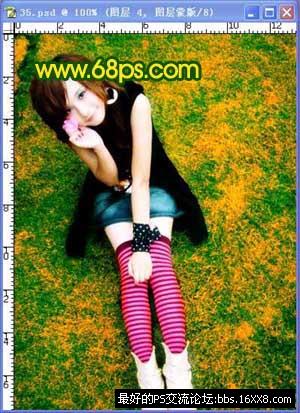
Figure 5
5. Stamp (CTRL+SHIFT+ALT+E), create a new layer, fill it with color #: F2AD47, set the layer blending mode to color deepen, add the layer mask and erase it with a black brush For the character part, the effect is shown in Figure 6. 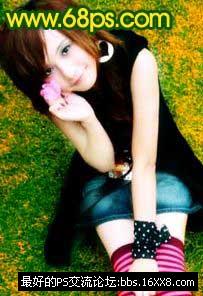
Figure 6
6. Use the Dodge tool to paint the right arm of the character. The approximate effect is as shown in Figure 7. 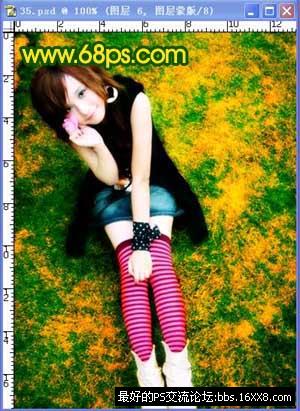
Figure 7
7. Create a new layer, stamp the layer, execute: Filter-Blur-Gaussian Blur, the value is 3, after confirming, set the layer blending mode to Overlay, and then use a mask to erase the characters (this step is mainly to add grass Aesthetics, no processing of characters), the effect is shown in Figure 8. 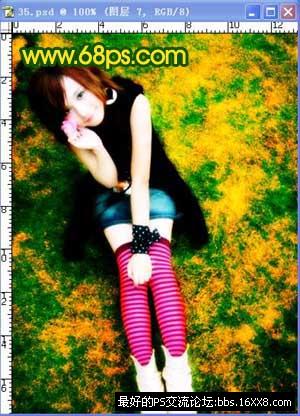
Figure 8
8. Create a new layer, stamp the layer, execute: Filter-Blur-Gaussian Blur, the value is also 3, the blending mode is Soft Light, the effect is as shown in Figure 9. 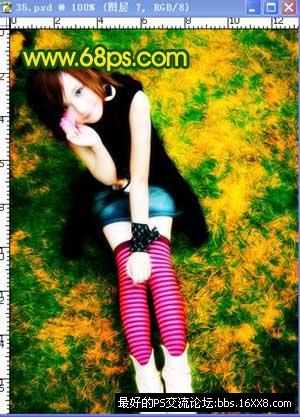
Figure 9
9. Stamp the layer and use the TOPAZ filter to sharpen it.
10. Create curves, levels, and brightness/contrast adjustment layers respectively. The parameter settings are as shown in Figure 10-12, and the effect is as shown in Figure 13. 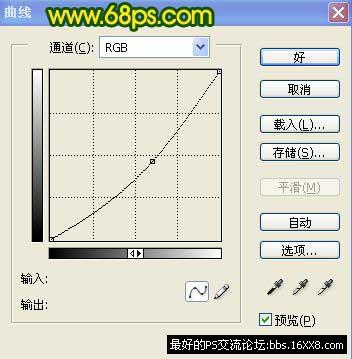
Figure 10 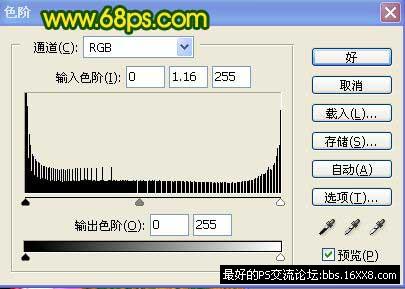
Figure 11
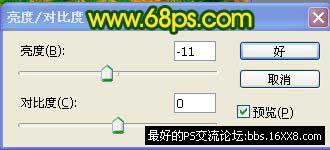
Figure 12 
Figure 13
11. Stamp the layer and stamp it Add your own signature and modify it with a brush to complete the final effect.
Figure 14
Search for updates Posts on many related topics: Non-mainstream PS tutorial photoshop tutorial
Original image
Final effect
1. CTRL+J copies a layer and operates on the copied layer!
2. Create a curve adjustment layer and set the parameters as shown in Figure 1-3.
Figure 1
Figure 2
Figure 3
3. Use a black paintbrush to erase the character part, the effect is as shown in Figure 4.
Figure 4
4. Create a new layer, press Ctrl + Alt + Shift + E to stamp the layer, execute: Filter-Blur-Gaussian Blur, set the value to 3 and set the layer blending mode to Soft Light. The effect is as shown in Figure 5.
Figure 5
5. Stamp (CTRL+SHIFT+ALT+E), create a new layer, fill it with color #: F2AD47, set the layer blending mode to color deepen, add the layer mask and erase it with a black brush For the character part, the effect is shown in Figure 6.
Figure 6
6. Use the Dodge tool to paint the right arm of the character. The approximate effect is as shown in Figure 7.
Figure 7
7. Create a new layer, stamp the layer, execute: Filter-Blur-Gaussian Blur, the value is 3, after confirming, set the layer blending mode to Overlay, and then use a mask to erase the character.��(This step is mainly to increase the beauty of the grass and not to deal with the characters). The effect is shown in Figure 8.
Figure 8
8. Create a new layer, stamp the layer, execute: Filter-Blur-Gaussian Blur, the value is also 3, the blending mode is Soft Light, the effect is as shown in Figure 9.
Figure 9
9. Stamp the layer and use the TOPAZ filter to sharpen it.
10. Create curves, levels, and brightness/contrast adjustment layers respectively. The parameter settings are as shown in Figure 10-12, and the effect is as shown in Figure 13.
Figure 10
Figure 11
Figure 12
Figure 13
11. Stamp the layer and stamp it Add your own signature and modify it with a brush to complete the final effect.
Figure 14
Search for updates Posts on many related topics: Non-mainstream PS tutorial photoshop tutorial
<!–Collectio
 微信扫一扫打赏
 支付宝扫一扫打赏

