Photoshop Tutorial: Lao Ma Tutorial_Moisten your photosPhotoshopjiao cheng: lao ma jiao cheng _run ze ni de xiang pian
Author: mamamia Tutorial source: China Tutorial Network Forum
Generally, we adjust the picture to have a sugar-water MM effect, but in the end we don’t know what to do. Many friends find it difficult to grasp the Matthew effect in sharpening transitions, saturated transitions, or curve adjustments and contrast adjustments. Take a look at this tutorial:
Let’s take a look at the before and after:
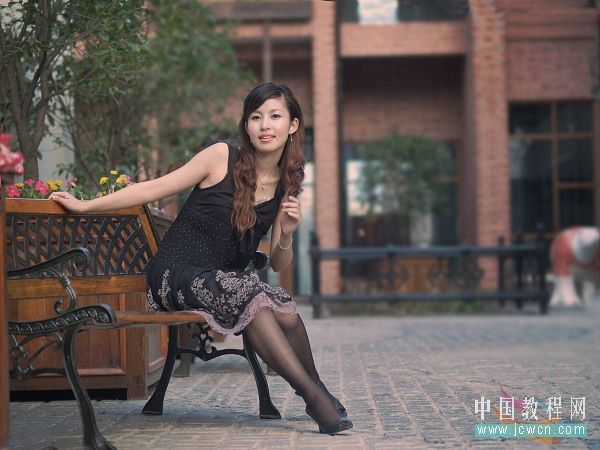
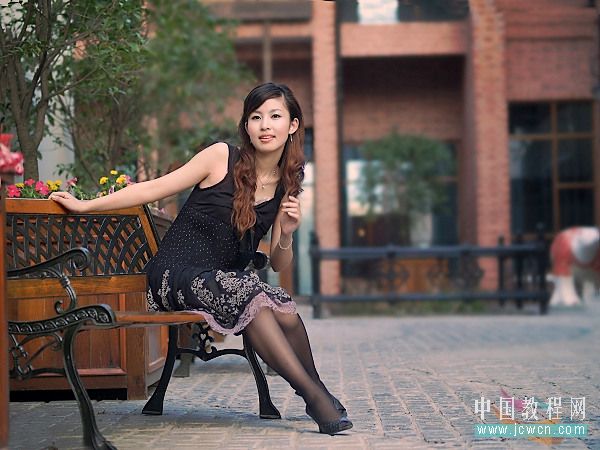
1. Open a picture
2. In the first step, I want to select the mid-tone and perform the calculation function. The settings are as shown in the picture. Lao Ma, what is the use of the mid-tone?
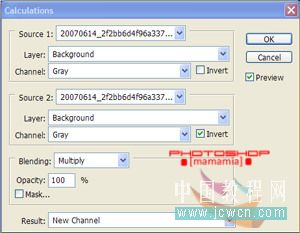
This selection excludes highlights and dark areas. I can smoothen, brighten, and darken this selection. In addition to smoothing, I use hue and saturation and set it to 20–50
Why is the calculation set up like this? Wudong Zhai’s new book “The Art of Choice” introduces this. If you have any questions, you can contact him and he will give you a very detailed theory.
Laoguan, give me advertising money, haha
3. The second step, CTRL ALT ~, this shortcut key is to select the highlight, save the selection as a new channel, as shown in the picture, name: HIGH

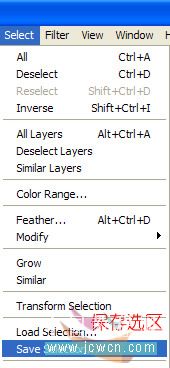
Scared? Old horse, what’s the use of doing this? You can use curves or levels to darken the highlight area, so that the picture won’t be too violent, and you can blend the light and dark of the picture
4. The third step is to invert the highlight of the second step. We now have the dark area. Save the selection as a new channel and name it: LOW,
With this selection, we can brighten and bring out the details in the dark, and we can also sharpen with USM

The selection is set up. Let me have a cup of tea and take a rest
5. Let’s go to the channel. You will find that there are three new friends in the channel, namely the mid-tone, highlight, and dark channels. Isn’t it fun?
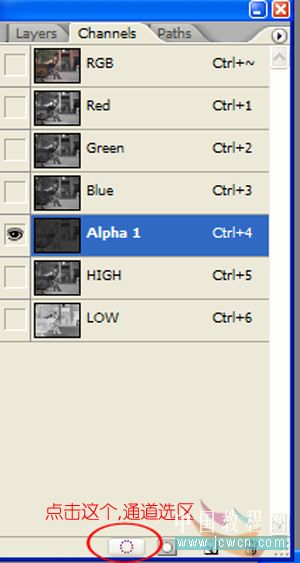
6. Click on the mid-tone channel and press the channel selection selection. As shown in the picture, there is a warning popping up. Anything less than 50% will not be displayed as a selection.
Ignore it and press OK.
Click on RGB, go back to the layer, and select the middle area. I will first smooth the skin and use the filter to blur the surface. The setting parameters are: 5,17
Next, I need to adjust the curve. Depending on the picture, I can set the ideal adjustment myself
7. It’s still a channel, this time we choose highlight. If the picture is not too violent, there is no need to adjust it, or it doesn’t matter if you use a curve to make it a little darker, as long as you like it
8. Stamp the layer and select the dark area for the channel. This selection is my favorite. I use sharpening on this selection. No plug-in? It doesn’t matter, we can use USM. Set it to about 100, 1.0, 4, and use the curve to brighten some areas. ,Use a mask to repair the areas you don’t want to change if necessary
Finally, adjust the curve of the whole picture, compare it, decide what you want, and complete
Let’s take a look at the before and after. After such adjustments, the picture has been changed very delicately. Is it more moisturized?
What? Not much change? Remember, don’t adjust the image too extreme. It’s like fertilizing a potted plant. If you apply too much fertilizer, you won’t need to apply it in the future, and it will die!
What? It’s really troublesome to have to select a selection every time. Lao Ma, just make an action and then execute this action. Lao Ma, can you provide the action by the way!
The movements of my old horse must sell prestige. Don’t be lazy. Can you do it yourself? You can look for tutorials related to movements. I digress from the topic. The simple ones will be taught to you. The profound ones will be shared by you. Non-mainstream photos. |qqkongjian|feizhuliu|tupian|luntan|psjiaocheng|bishua|ruanjian|chajian|xiazai|psxiazai|qqkongjiandaima
<!–Collectio

 微信扫一扫打赏
 支付宝扫一扫打赏

