The structure of the physical drawing in this tutorial is relatively complicated, but the basic small elements are all made using similar methods. As long as you master the basic perspective and the realization of highlights and shadows, it is easy to make.
Original image

1. Create a new 600 * 600 pixel file. Use white for the background temporarily. Create a new layer and use the straight line tool to simply draw the outline as shown in Figure 1. You don’t need too many details. The basics are out. Can.

2. Start making. First, apply a black and white radial gradient to the background. Create a new layer and start making the upper part of the wooden box. Use the pen tool to outline the path shown in Figure 2 and turn it into a selection. Set the gradient tool color as shown in Figure 3, and then pull out the linear gradient shown in Figure 4.


3. Then make several other faces. The gradient color can refer to the picture below, which is basically a two-color gradient. The production method is to first use the pen tool to outline the shape of the facet, convert it to a selection and then apply the gradient color. In order to save time, I will skip it here.

4. When making the main structure, there are many faces here, so you need to pay attention to the changes in color levels.

5. The production of several sides of the box is relatively simple. The approximate effect is as shown below.

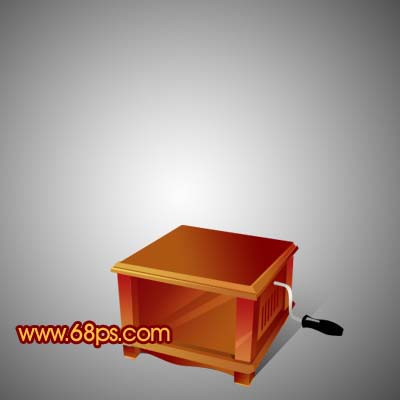
6. After completing the box part, add some reflection and projection appropriately. The effect is as shown in Figure 8.

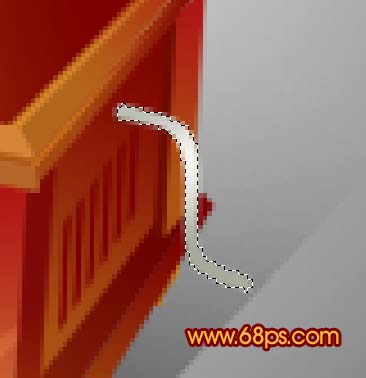
7. To make the handle part, create a new layer, use the pen tool to outline the shape, then convert it to a selection, and apply the gradient color. The general process is as shown in Figure 9 and 10.


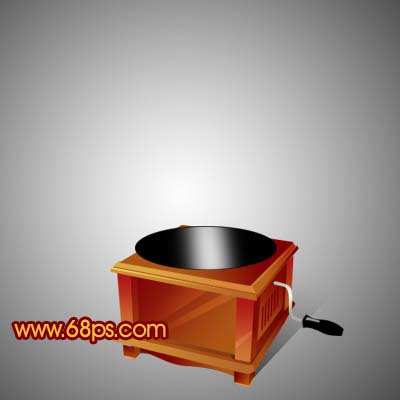
8. To create the disc part, create a new layer, use the Elliptical Marquee Tool to draw an ellipse as shown in Figure 11, and fill it with black.

9. Select the Rectangular Marquee Tool to draw a vertical rectangle, press Ctrl + Alt + D to feather, the value is 15, as shown in Figure 12, and then create a new layer filled with white.


10. Change the angle appropriately and delete the excess part, as shown in Figure 14.

11. Create a new layer and add an obvious white line in the center of the disc in the same way as shown in Figure 15.

12. Add reflections and shadows as shown in Figure 16.

13. Use the same method to create a slightly smaller ellipse on the disc as shown in Figure 17.

14. The approximate effect of the CD is shown in Figures 18 and 19.


15. Start making the speaker part. The general process is as shown in Figure 20-24.


16. Make the metallic texture inside the speaker part, as shown in Figures 25 and 26.


17. Finally, adjust the overall details and colors to complete the final effect.

Author: Sener Source: PS Alliance
The structure of the physical drawing in this tutorial is relatively complicated, but the basic small elements are all made using similar methods. As long as you master the basic perspective and the realization of highlights and shadows, it is easy to make.
Original image

1. Create a new 600 * 600 pixel file. Use white for the background temporarily. Create a new layer and use the straight line tool to simply draw the outline as shown in Figure 1. You don’t need too many details. The basics are out. Can.

2. Start making. First, apply a black and white radial gradient to the background. Create a new layer and start making the upper part of the wooden box. Use the pen tool to outline the path shown in Figure 2 and turn it into a selection. Set the gradient tool color as shown in Figure 3, and then pull out the linear gradient shown in Figure 4.


3. Then make several other faces. The gradient color can refer to the picture below, which is basically a two-color gradient. The production method is to first use the pen tool to outline the shape of the facet, convert it to a selection and then apply the gradient color. In order to save time, I will skip it here.

4. When making the main structure, there are many faces here, so you need to pay attention to the changes in color levels.

5. The production of several sides of the box is relatively simple. The approximate effect is as shown below.

6. After completing the box part, add some reflection and projection appropriately. The effect is as shown in Figure 8.

7. To make the handle part, create a new layer, use the pen tool to outline the shape and then turn it into a selection, add the gradient color, roughlyThe process is shown in Figures 9 and 10.


8. To create the disc part, create a new layer, use the Elliptical Marquee Tool to draw an ellipse as shown in Figure 11, and fill it with black.

9. Select the Rectangular Marquee Tool to draw a vertical rectangle, press Ctrl + Alt + D to feather, the value is 15, as shown in Figure 12, and then create a new layer filled with white.


10. Change the angle appropriately and delete the excess part, as shown in Figure 14.

11. Create a new layer and add an obvious white line in the center of the disc in the same way as shown in Figure 15.

12. Add reflections and shadows as shown in Figure 16.

13. Use the same method to create a slightly smaller ellipse on the disc as shown in Figure 17.

14. The approximate effect of the CD is shown in Figures 18 and 19.


15. Start making the speaker part. The general process is as shown in Figure 20-24.


��


16. Make the metallic texture inside the speaker part, as shown in Figures 25 and 26.


17. Finally, adjust the overall details and colors to complete the final effect.

Author: Sener Source: PS Alliance
<!–Collectio

 微信扫一扫打赏
 支付宝扫一扫打赏

